

![]() Simplify your construction project management with our easy-to-use table customization options. Customize columns by sorting, filtering, or hiding them to match your project needs. Enjoy a streamlined and efficient tool that's simple to use.
Simplify your construction project management with our easy-to-use table customization options. Customize columns by sorting, filtering, or hiding them to match your project needs. Enjoy a streamlined and efficient tool that's simple to use.
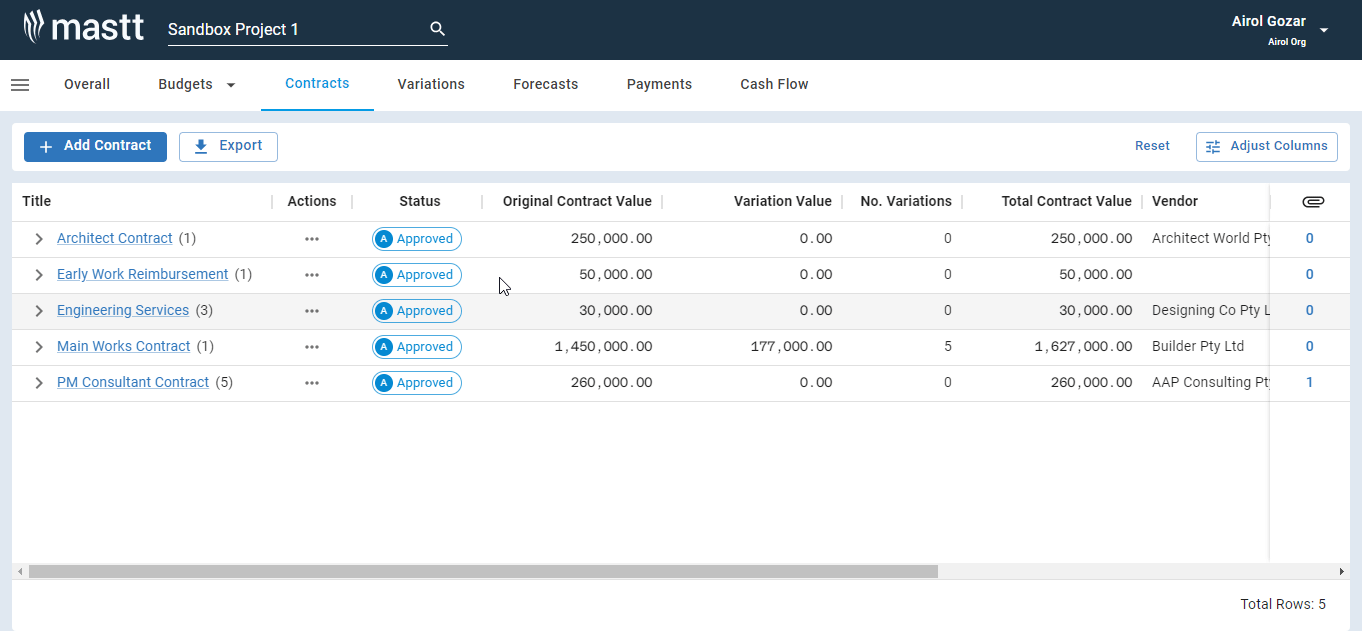
Step 1: To access the desired project, click on the Project Name tab.
Step 2: Click the Hamburger Menu (![]() ) at the top-left-hand corner and select Cost.
) at the top-left-hand corner and select Cost.
Step 3: From the Cost Module, navigate to the Contracts Register.
Step 4: To view additional options, hover over a column header and click on the Three Dots Menu (...). This will reveal a drop-down menu with various choices.
Step 5: Select the action you want to perform from the drop-down menu and follow the instructions provided.
Follow below steps to get it done and see other page functions.
- Sort by Ascending & Descending
- Filter Column data
- Hide / Show Columns
- Pin to left and right
- Additional Functions
Sort by Ascending & Descending
Sort your data in either ascending (ASC) or descending (DESC) order.

Step 1: From the Cost Module, navigate to the Contracts register.
Step 2: Hover over a column title to reveal the Three Dots Menu (...) and arrow icon, then click the Three Dots Menu (...) to display available options.
Step 3: To sort your data in ascending order, click on Sort by ASC. To sort your data in descending order, click on Sort by DESC.
Tip: Choose Unsort to return the data to its original order.
Filter Column data
Filter your data based on specific columns, operators, and their corresponding values.

Step 1: From the Cost Module, navigate to the Contracts register.
Step 2: Hover over a column title to reveal the three-dots menu and arrow icon, then click the Three Dots Menu (...) to show options.
Step 3: Select Filter to reveal the filter menu.
Step 4: From the filter menu, you can select the Columns Title, Operator and Value to filter.
Hide / Show Columns
Hide columns that are available or locate columns that are not currently displayed on the page.

Step 1: From the Cost Module, navigate to the Contacts register.
Step 2: Hover over the title of the available Column and click the Three Dots Menu (...). Select Hide for the selected column to be hidden.
Step 3: Navigate to any column, click the Three Dots Menu (...), and choose Show columns to display or expose a specific column that is not displayed.
Tip: You can select the column title you want to display in the columns section from a menu that will appear. Select Hide all / Show all if you wish to apply the action to all the columns.
Pin to left and right
Pin a column to the far right or left side of the column page for easy access and visibility.
Step 1: From the Cost Module, navigate to the Contracts register.
Step 2: Hover over a column title to reveal the three-dots menu and arrow icon, then click the Three Dots Menu (...) to show options.
Step 3: Choose the column that you would like to Pin to left / Pin to right.
Tip: You may use Unpin to revert the action.
Additional Functions

| Label | Description |
| Reset | Reset both filters and the entire column to their default settings. |
| Adjust Columns | Use this function to display or conceal columns. |
| Vertical line | Drag the vertical line at the beginning or end of the column header to resize the column. |
Need assistance? Click the link to submit a support ticket! We're here to help further.