
![]() The Project Schedule tracks your project through each stage, milestone, gate or phase (depending on your organisation). Using a common Project Schedule across many projects will simplify reporting and allow you to easily compare the status of your projects.
The Project Schedule tracks your project through each stage, milestone, gate or phase (depending on your organisation). Using a common Project Schedule across many projects will simplify reporting and allow you to easily compare the status of your projects.
Table of Contents
- How to access the Project Schedule.
- What information is tracked within Mastt, and how do I report this information?
- How to add/edit the Project Schedule.
- How to create or change Schedule Templates.
How to access the Project Schedule
In a Project, click the three lines (Hamburger Menu) at the top-left-hand corner and select Schedule:

What information is tracked within Mastt, and how do I report this information?
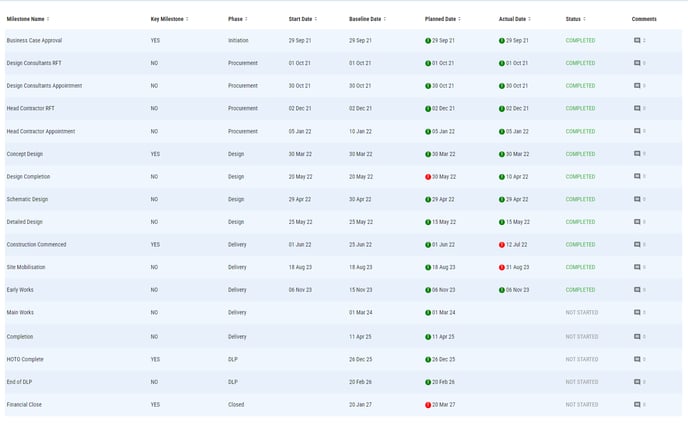
You can track the status, phases, and key dates (start, baseline completion, forecast completion, and actual completion) for your Project Milestones.
You can export all milestones to an Excel document by clicking on the three dots and then clicking Download: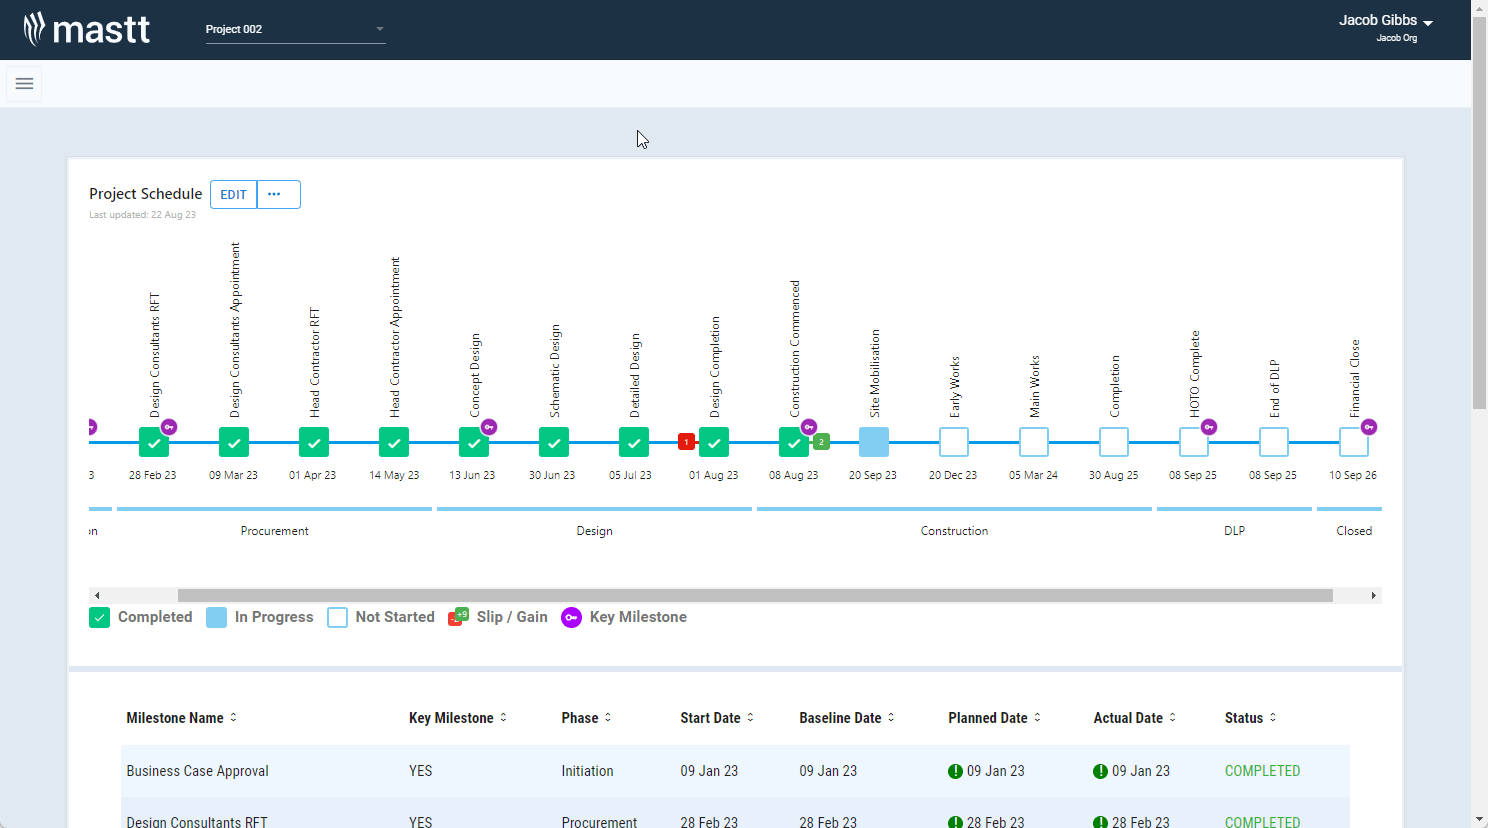
If you have made changes to a schedule export and want to get the information back into Mastt, reach out to your Customer Success Manager for assistance.
All schedule information is available on the Dashboard, with four different tiles to choose from:
Project Phases - this tile shows the current phase your Project is in, and when it is expected to leave that phase.
Schedule Milestone Chart - shows project milestones, their phase, completion status and slip/gain (if relevant).
Schedule Milestone Table - shows project milestones, their phase, completion status, comments, and dates in a table.
Progress Rings - shows the progress between the starting and ending milestones.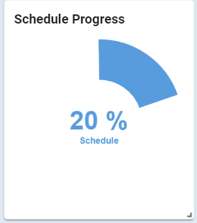
How to add/edit the Project Schedule
On the Project Schedule page, click on the Edit button and the Add/Edit form will then show up:
Click Add Row to add a new Schedule Milestone. You can then enter:
- Milestone Name
- Phase
- Start Date
- Baseline Completion Date
- Forecast Completion Date
- Milestone Status
- Start and End Marker - these are used by the Progress Ring tile to determine how far through the project you are.
- Comments
Once the Milestone Status has been moved to Completed, you can enter the Actual Completion Date.
If you have created a Schedule Milestone Template, you can apply it to the Project. Click the drop-down in the top-right-hand corner of the form and choose the template you would like to apply.
Once you are done, click Save.
How to create or change Schedule Templates
You need to be an Admin to create or change Schedule Templates.
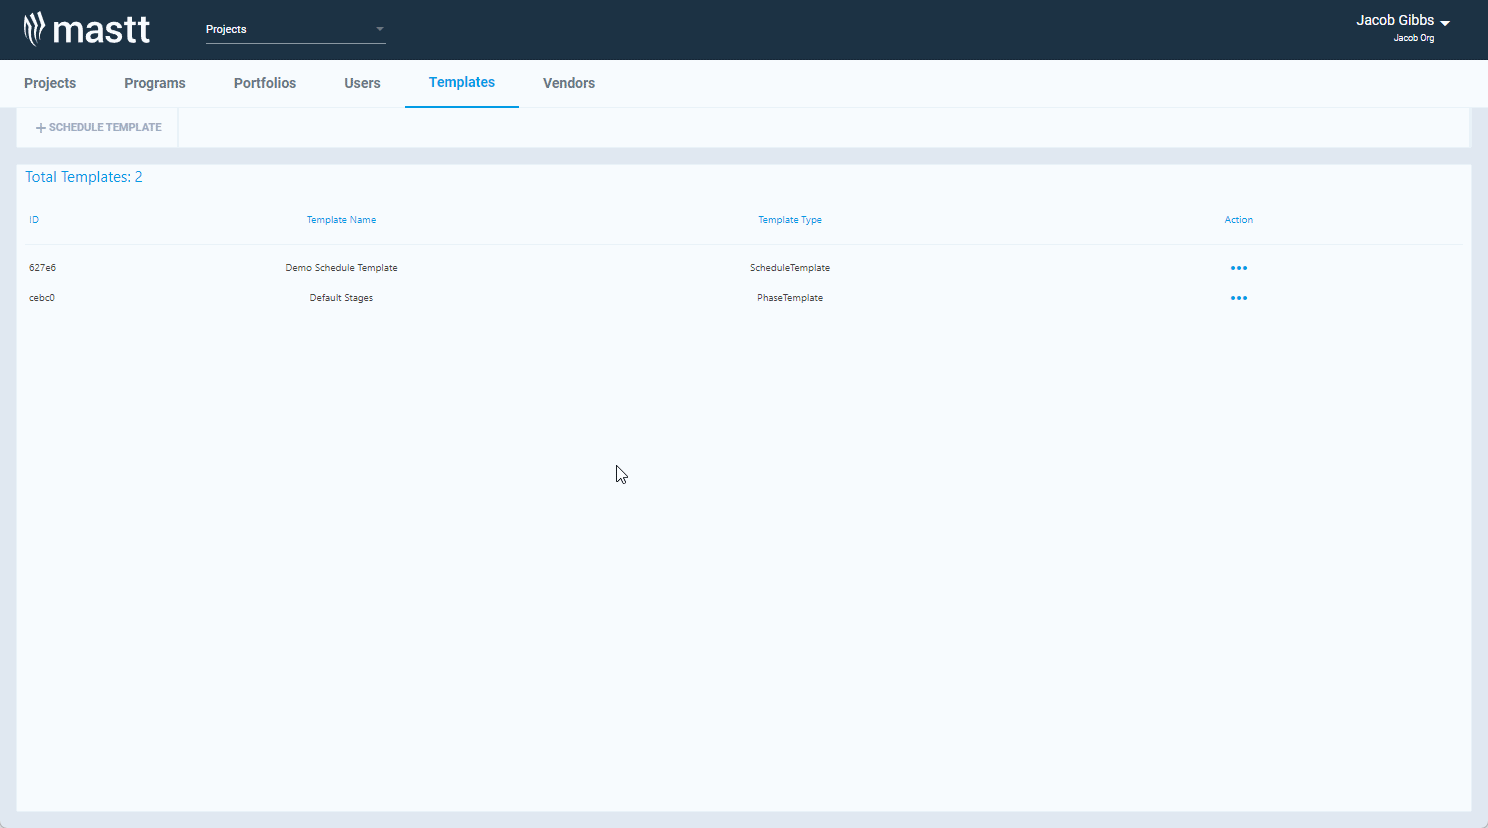
To create or change Schedule and Phase templates:
- Navigate to the Admin area by clicking on your name in the top-right-hand corner and selecting Admin
- Click Templates
There are no limits on Schedule Templates, but you can only have One Phase Template. You will already have a Phase Template.
Editing the Phase Template
To edit the Phase Template, click on the three dots next to the Phase Template and click Edit Template:
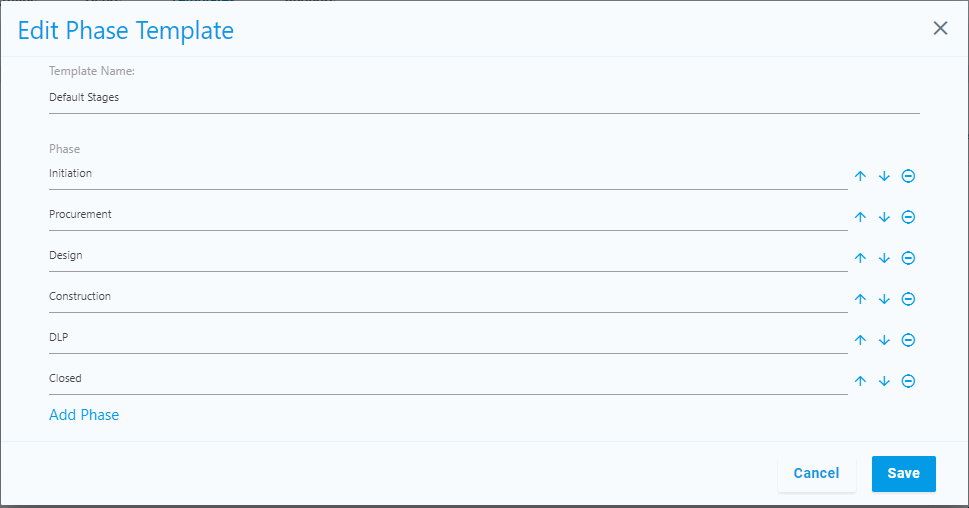
You can change the Template Name, the Phase Names, add additional Phases, and change their order by using the arrows. The order of the Phases determines their order in the Schedule Module, so ensure the phases are in the correct order.
Make sure to assign a unique name to each phase to avoid any duplication of data.
Creating/Editing a Schedule Template
To create a Schedule Template, click on the + Schedule Template button at the top-left-hand corner. To edit an existing Schedule Template, click the three dots next to the Schedule Template and then click Edit Template.
You then can add/edit the:
- Template Name
- Milestone Name
- Milestone Description
- Phase
- Key Milestone Status - you can only set a Milestone as a Key Milestone on a Template.
- Milestone Order
Once finished, click Save!
You can create multiple Schedule Templates, allowing you to have different templates for different project types!