
Use advanced contract features to manage complex contracts with multiple sections, budgets and stakeholders. You can configure contract standards, assign roles, set up payment terms, and track costs across multiple project budgets.
Before you start
- You have permission to create or edit contracts.
- You know the contract standard that applies to your agreement.
Set contract standards and roles
Select a contract standard
- Open the contract form: click Cost > Contracts > + Add Contract (see How to Create a Contract), or click the Action button (three dots) next to an existing contract and select Edit Contract.
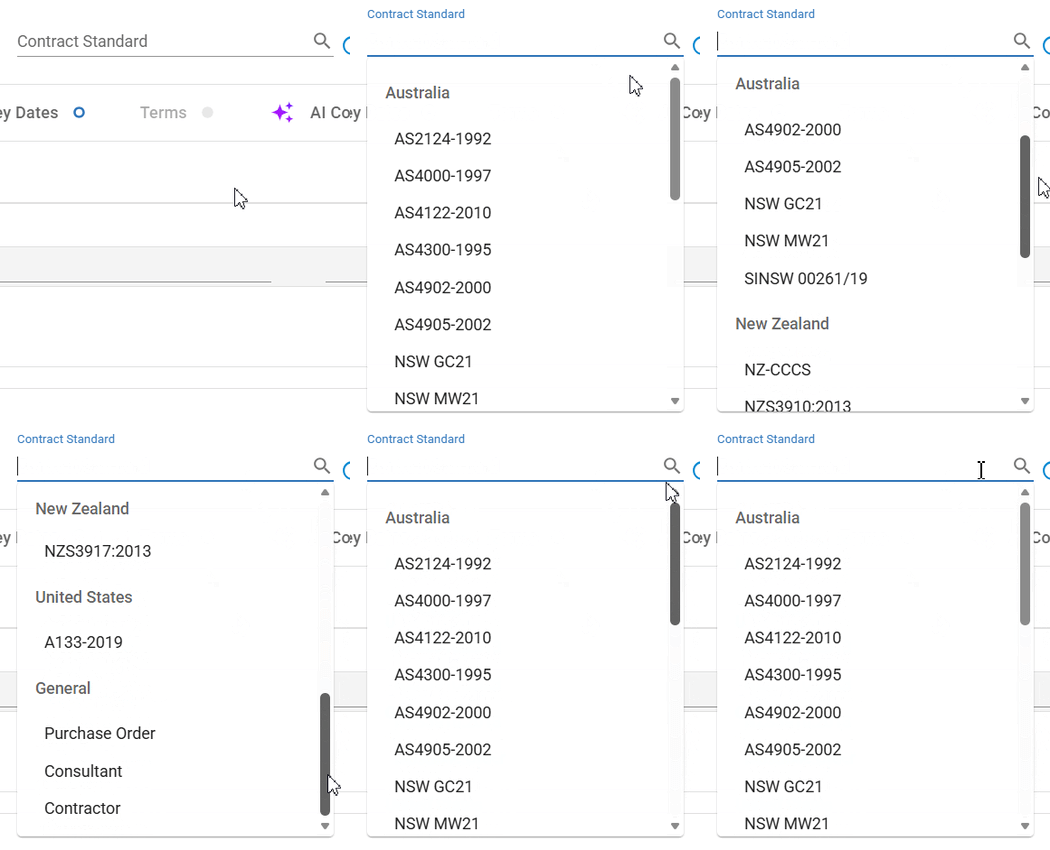
- Click the Contract Standard dropdown at the top of the dialog.
- Select the standard that applies to your contract type from the grouped list. If your standard is not listed, select Other Consultant or Other Contractor to customize. To have a missing standard added, contact Mastt Support.
- Check that the selected standard appears in the Contract Standard field.
Note: The contract standard determines the role labels and configuration options that appear in the Roles tab.
Assign stakeholders
- Click the Roles tab.
- Set the key stakeholders for your project:
- Click the Owner tab and select the contact.
- Set the Construction Manager role.
- Add the Project Manager for the contract.
- Add the Architect if your contract standard has one.
Note: The role tabs depend on your Contract Standard. This example uses A133-2019. Owner and Project Manager roles automatically apply to all contracts in your project once set.
Set the authorized person
- Click the Roles tab.
- Open the tab for the role that should sign letters (for example Architect).
- Turn on its toggle (for example Architect in A133-2019; the toggle's name depends on your contract standard).
- Select the person responsible for approving payments.
Note: When toggled on, this person appears as the signer at the bottom of all Change Orders and Payment letters. If no role is toggled on, letters don't show an Authorized by person.
Set contract terms
Set payment terms
- Click the Terms tab.
- Go to Payment Terms.
- Change the Payment Clause if necessary.
- Enter the contract's Tax %.
Set retainage terms
Note: Configuration of retainage limits is coming soon. Retainage can currently be applied in the Payments feature.
Set change terms
- Click Change Terms in the Terms section.
- Enter the Change Clause for the contract.
Note: These terms appear automatically in Change Approval letters.
Work with contract sections and line items
Add sections for work packages
- Click the Line Items tab.
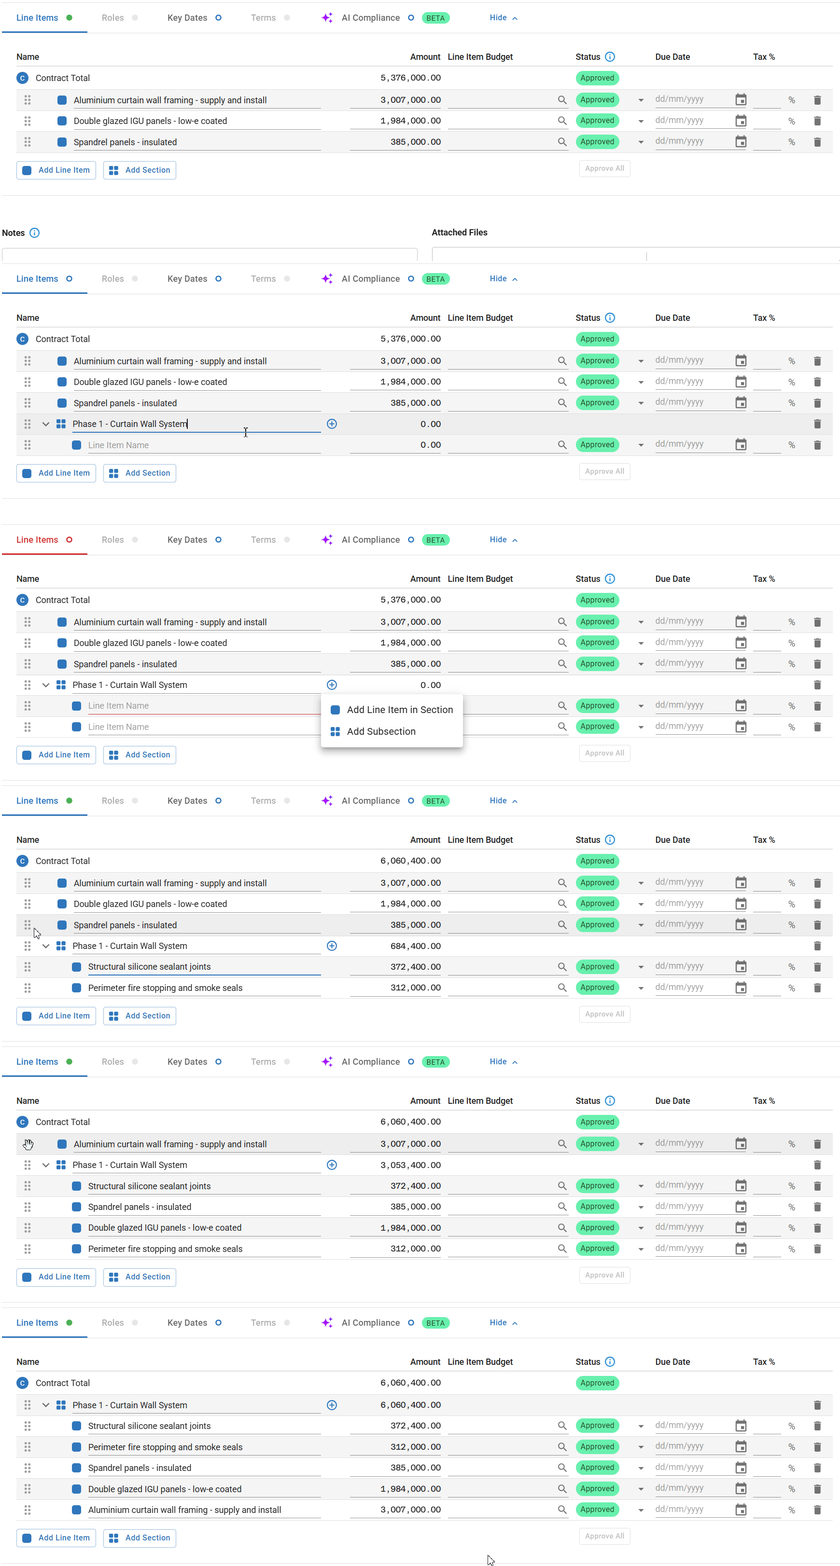
- Click Add Section.
- Enter a name for the section that matches your contract scope or trade.
- Click Add Section again to create more sections as necessary.
Tip: Use sections to organize work packages of complex contracts, such as different disciplines or project phases.
Add line items
- Click Add Line Item to add a line item, or click the plus icon on a section row to add one inside that section.
- Enter the line item details.
Move line items between sections
- Go to the grab handle icon (six dots) on the left side of the line item.
- Click the icon and drag the item to the correct section.
Tip: You can create subsections within sections for more detailed organization of multi-phase contracts.
Import line items from Excel
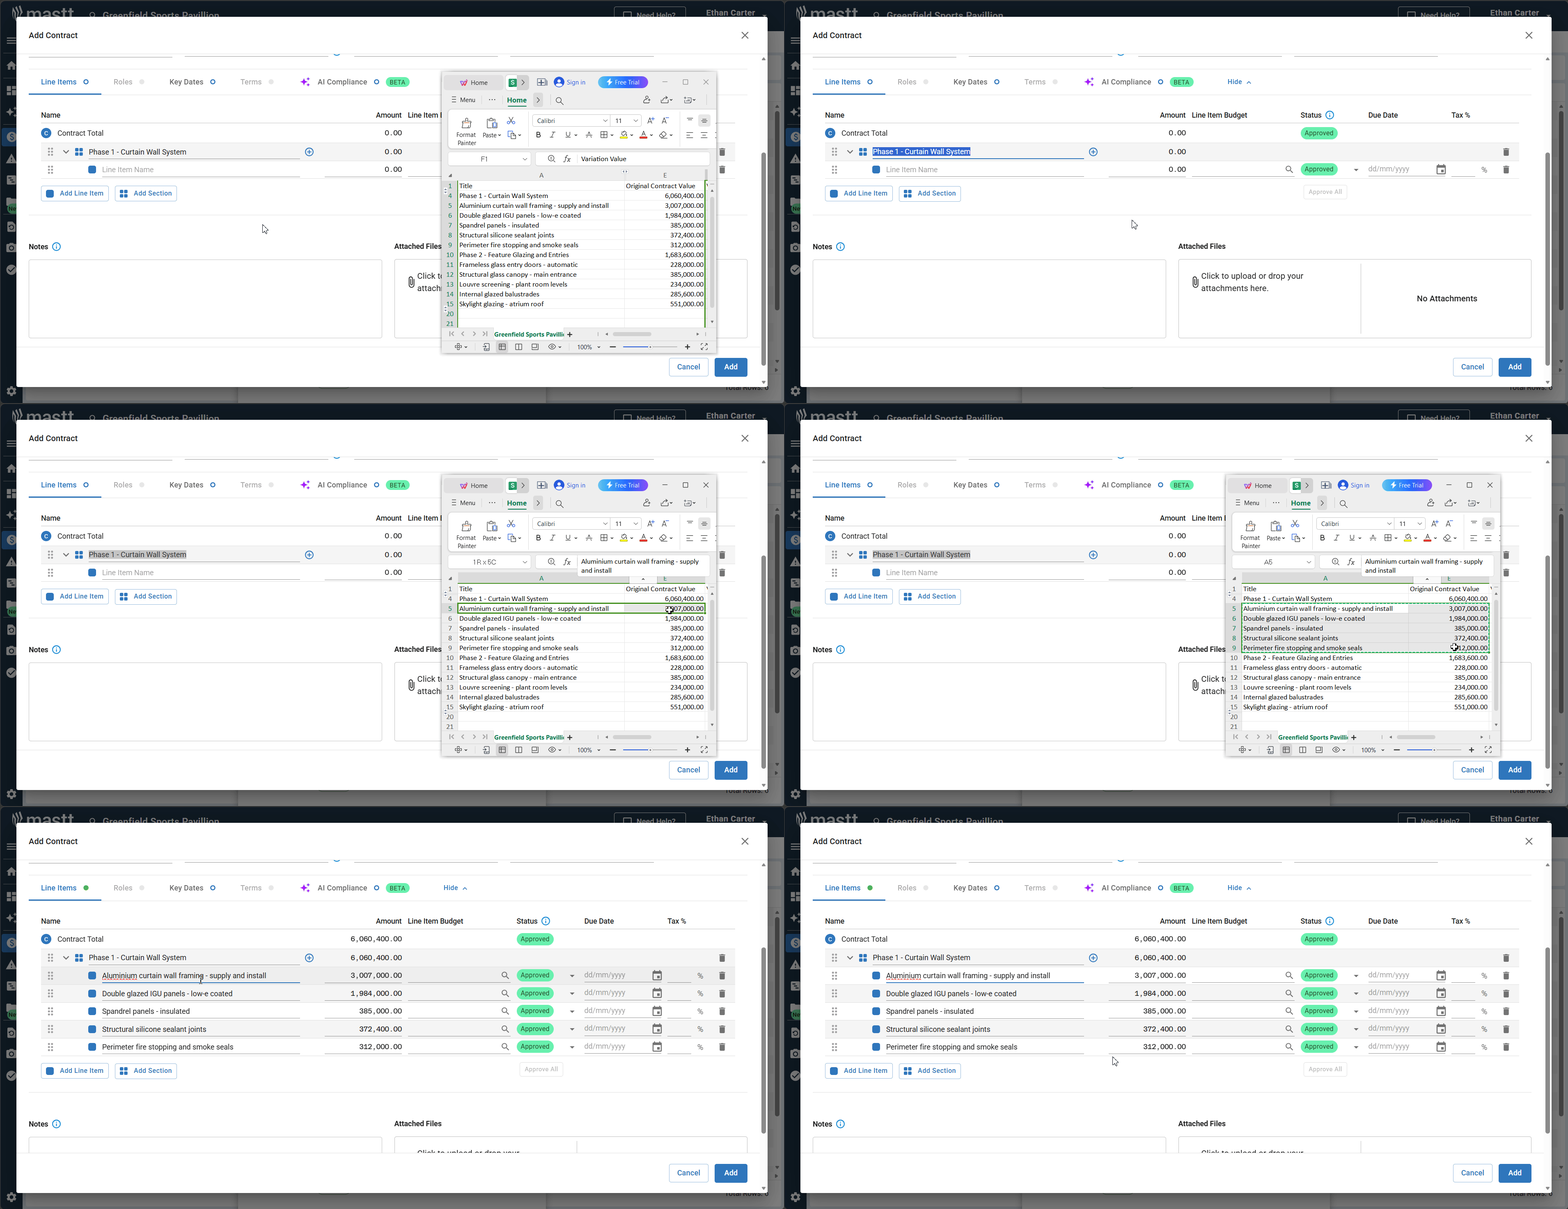
- Make sure the line-item names are in the left column of your spreadsheet.
- Make sure the values are in the right column.
- Select the cells in your spreadsheet.
- Go to Edit > Copy or use the keyboard shortcut to copy the cells.
- Click on an empty line-item field in the Mastt contract form.
- Enter the copied data by pasting it into the field.
- Check that the system has populated the contract line items correctly.
Tip: This feature saves significant time when you have a large number of line items to enter.
Set up multi-budget contracts
Use multi-budget assignments when you have a single contract but need to track costs against multiple project budgets.
Assign budgets to line items
- Click the Budget search field next to a line item.
- Select the relevant budget from the list (for example, preconstruction, demolition, or general construction).
- Check that each line item is assigned to the correct budget.
Troubleshooting and FAQs
| Question | Answer |
|---|---|
| What if my contract standard is not listed in the dropdown? | Select Other Consultant or Other Contractor to create a custom configuration. To have a missing standard added, contact Mastt Support. Use the search icon next to the dropdown to find a specific standard quickly. |
| Can I change the contract standard after I create the contract? | Go to the contract, click the Action button (three dots), and select Edit Contract. Click the Contract Standard dropdown and select a new standard. |
| How do I change a role that has already been assigned? | Go to the contract, click Roles, and click the name field for the role you need to change. Select a new contact from the list. |
Need help?
Contact Mastt Support for additional assistance with advanced contract features.