
Use Work Breakdown Structure (WBS) codes to upload financial actuals for multiple projects in a single import. This process maps each transaction to the correct project automatically, which removes the need to upload actuals to each project one at a time.
Before you start
- Your ERP exports must include WBS element codes.
- You have access to multiple projects within your Mastt program.
- You have permissions to change project configuration settings.
Assign WBS codes per project
Tip: Make sure each project has a unique WBS code. Duplicate codes cause transactions to go to the wrong project.
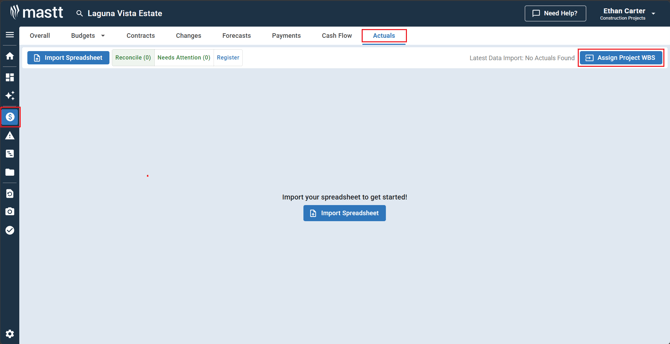
- Go to the Cost module in the first project.
- Click Actuals.
- Select Assign Project WBS.
- Enter the unique WBS code that matches your ERP system for this project.
- Click Save.
- Go to the next project and repeat steps 1 to 5 for all projects in the program.
Prepare the program-wide ERP export
- Go to your ERP system and export financial data for all projects in the required format.
- Check that the column headings match the Mastt specifications.
- Make sure each transaction row contains the correct WBS code.
Note: WBS codes must match exactly between your ERP export and Mastt. A difference in formatting, spacing, or capitalization causes the system to leave transactions unassigned.
Required and recommended columns
| Column | Required | Description |
|---|---|---|
| Val/COArea Crcy | Yes | Transaction dollar amount |
| Posting Date | Yes | Transaction date for cash flow display |
| WBS Element | Recommended | WBS code that maps each transaction to a project |
| Purchase Order Text | Recommended | Description of the purchase order |
| Purchasing Document | Recommended | Purchase order number |
| Cost Element | Recommended | Cost element description |
Import actuals at program level
Tip: Start with recent months rather than historical data. This helps you avoid duplicate reconciliation issues.
- Go to the Program Dashboard.
- Check that all relevant projects are included in the program.
- Go to Cost > Actuals.
- Click Import Spreadsheet.
- Select the program-wide export file and upload it.
- Click Confirm to start the import. The system distributes each transaction to the correct project based on its WBS code.
Verify project assignments
Check assignments in program view
- Go to Cost > Actuals in the program view.
- Select the Register view.
- Check the Project column to verify that transactions are assigned to the correct projects.
- Select the checkbox next to any incorrect line items and reassign them to the correct project.
Check assignments at project level
- Go to Cost > Actuals in the individual project.
- Select the Reconcile view to check for automatic matches.
- Check the reconciliation results and make sure all actuals are matched correctly.
Tip: An automatic assignment rate above 90% means your WBS codes are well configured. If the rate is lower, check for formatting differences between your ERP and Mastt.
Troubleshooting and FAQs
Why are transactions not assigned to a project after import?
Check for extra spaces, different capitalization, or special characters in your WBS codes. Open each project and compare the code in Mastt with the corresponding value in your ERP export.
What if I do not have permission to assign WBS codes?
Contact your system administrator to request the appropriate access permissions for project configuration.
Is program-level upload required?
No. You can upload actuals to each project individually as an alternative. Program-level upload is recommended when you manage actuals for multiple projects at the same time.
Need help?
Contact Mastt Support for additional assistance with uploading actuals and WBS code configuration.