
AI Pre-fill extracts change order details from uploaded PDF documents, saving time on manual data entry. Mastt AI scans your document and populates change order titles, contract references, amounts, dates, and time impacts in seconds.
Before you start
- Have your change order document saved as a PDF.
- Ensure the PDF is clear and well-formatted (avoid poor-quality scans).
- Verify the relevant contract exists in Mastt and has a Completion Date if the change order includes time impacts.
Create a change order with AI Pre-fill
Open the Changes form
- Navigate to the Cost module from the left navigation bar.
- Add a change using one of these methods:
- From the Overall page, click the blue + Add button and select + Add Change.
- On the Overall page, locate the contract, click the Action button next to it, and select + Add Change.
- Click Changes in the top navigation, then click the blue + Add Change button.
The Add Change form opens. If you started from a specific contract, that contract is preselected.
Upload the change order PDF
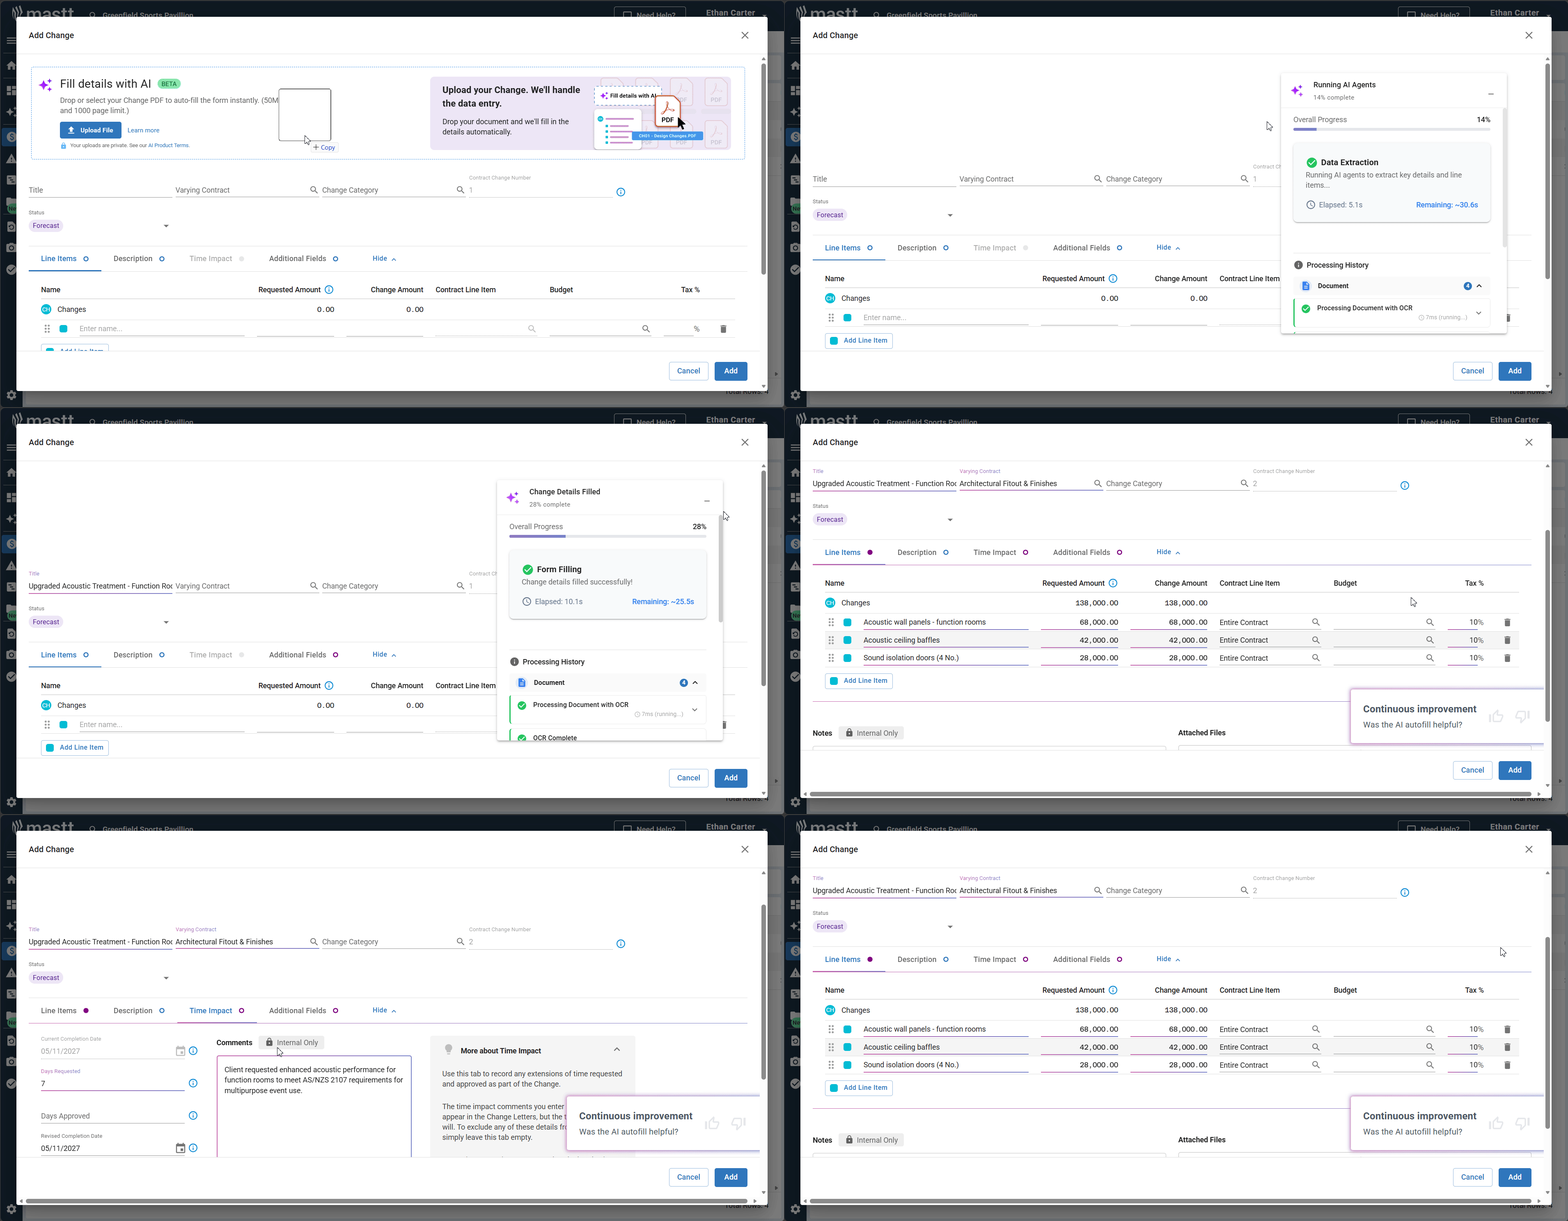
- At the top of the Add Change form, locate the Fill details with AI panel.
- Upload your document in one of these ways:
- Click Upload File to open your file browser, select your PDF, then click Open.
- Drag and drop the PDF file directly onto the upload area.

Wait for AI extraction
- Once uploaded, a progress banner displays while Mastt AI analyzes your document.
- The AI extracts the change order title, contract reference, amounts and values, and time impact information. Form fields automatically populate with the extracted data, and AI-populated fields display with highlight styling (except the Description field).
Review and complete change order details
- Locate the Varying Contract dropdown and confirm the AI selected the correct contract. If incorrect, click the dropdown and select the correct contract.
- Review and adjust the fields in the table below.
- Click the Description tab and review or edit the extracted description text.
| Field | What to do |
|---|---|
| Change Title | Verify accuracy or edit as needed |
| Change Category | Select the appropriate category (Scope Change, Buildability or Quality, Force Majeure, Compliance, etc.) |
| Status | Select the current status (Draft, Forecast, Pending, In Principle, Approved, Rejected, Withdrawn). Learn more about change order statuses. Forecast and Pending change orders are uncommitted; In Principle is a committed cost, treated like Approved, and can be paid against; Draft, Rejected and Withdrawn do not appear in financial reports. |
Adjust line items
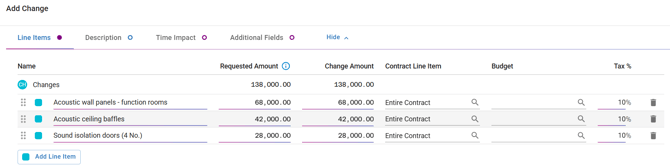
- Scroll to the Line Items section and review extracted line items.
- For each line item, verify the name, Requested Amount and Change Amount.
- Check the Contract Line Item field. It defaults to "Entire Contract", so only change this if the change order affects a specific contract line item.
- To add additional line items not in the original document, click Add Line Item.
Add time impacts and save
- If the change order affects the project timeline, click the Time Impact tab and enter the Days Claimed and Days Approved (use negative numbers for time reductions). Time extensions are calculated using weekdays only (Monday to Friday).
- The uploaded PDF is automatically attached to the change order. To add supporting documents, scroll to the Attached Files section and upload additional files.
- Review all details for accuracy, then click the blue Add button (bottom right). A success notification confirms the change order is created, and it appears in your Changes register.
Note: If the Time Impact tab is grayed out, the contract has no completion date. Edit the contract (Action > Edit Contract), open the Key Dates tab and set the completion date. See How to Create a Contract for details. For time-only change orders with no cost change, add a line item with $0 change amount.
Troubleshooting and FAQs
What if the AI selects the wrong contract?
Click the Varying Contract dropdown and manually select the correct contract from the list.
Why is the Time Impact tab grayed out?
If the Time Impact tab is grayed out, the contract has no completion date. Edit the contract (Action > Edit Contract), open the Key Dates tab and set the completion date.
What if the AI extraction misses information?
Manually enter or adjust any missing or incorrect information in the form fields. AI Pre-fill provides a starting point, so always review for accuracy.
What if I need to record a time impact without cost changes?
Add a line item with $0 change amount. Mastt requires at least one line item for the change order structure, even for time-only change orders.
Need help?
Contact Mastt Support for additional assistance with AI Pre-fill or change orders.