
Mastt supports two types of logos: workspace logos that appear across all projects, and client logos that apply to individual projects. Client logos appear in dashboards, payment certificates, and change order approval PDFs.
Before You Start
- Have your logo files ready (PNG or JPG format recommended)
- Requires Project/Workspace Admin access
Accessing Brand Settings
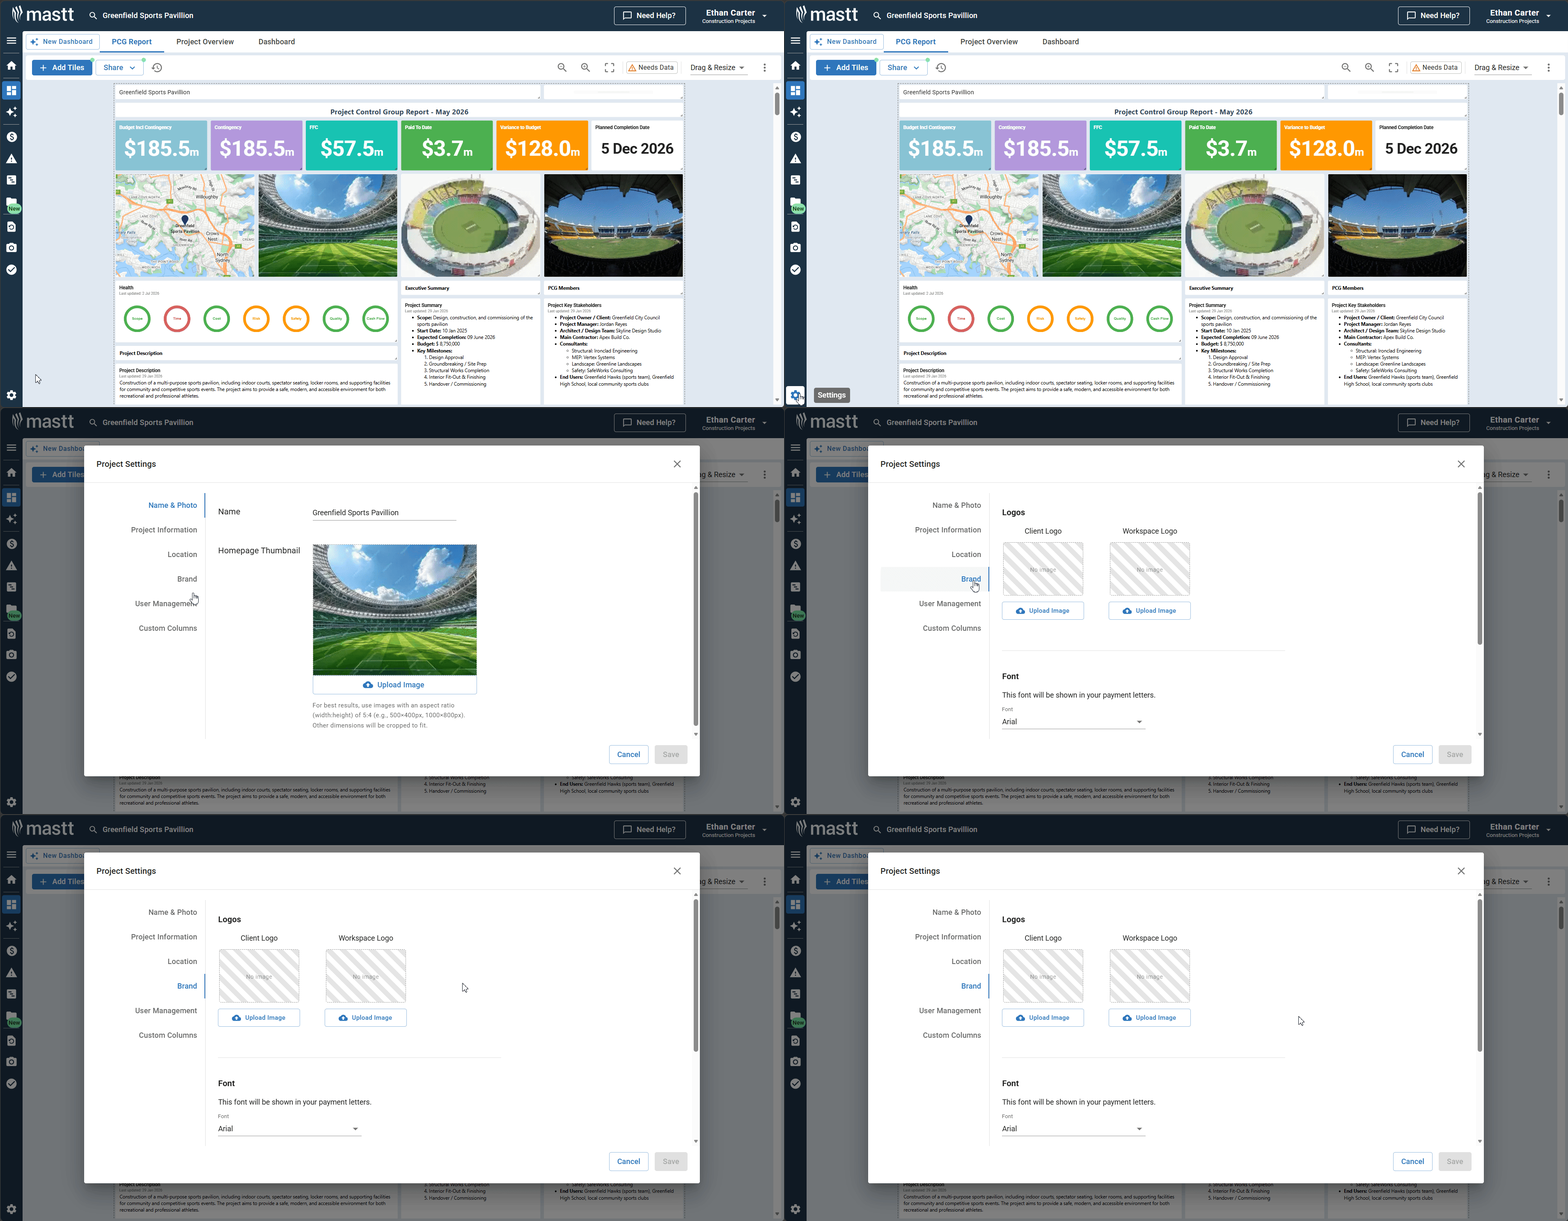
- Navigate to your project.
- Click Settings in the side navigation bar to open Project Settings.
- Select Brand from the left-hand menu.
You can also access Project Settings from the project list by clicking the Action button on the project and selecting Project Settings.
Uploading Your Logos
Client Logo
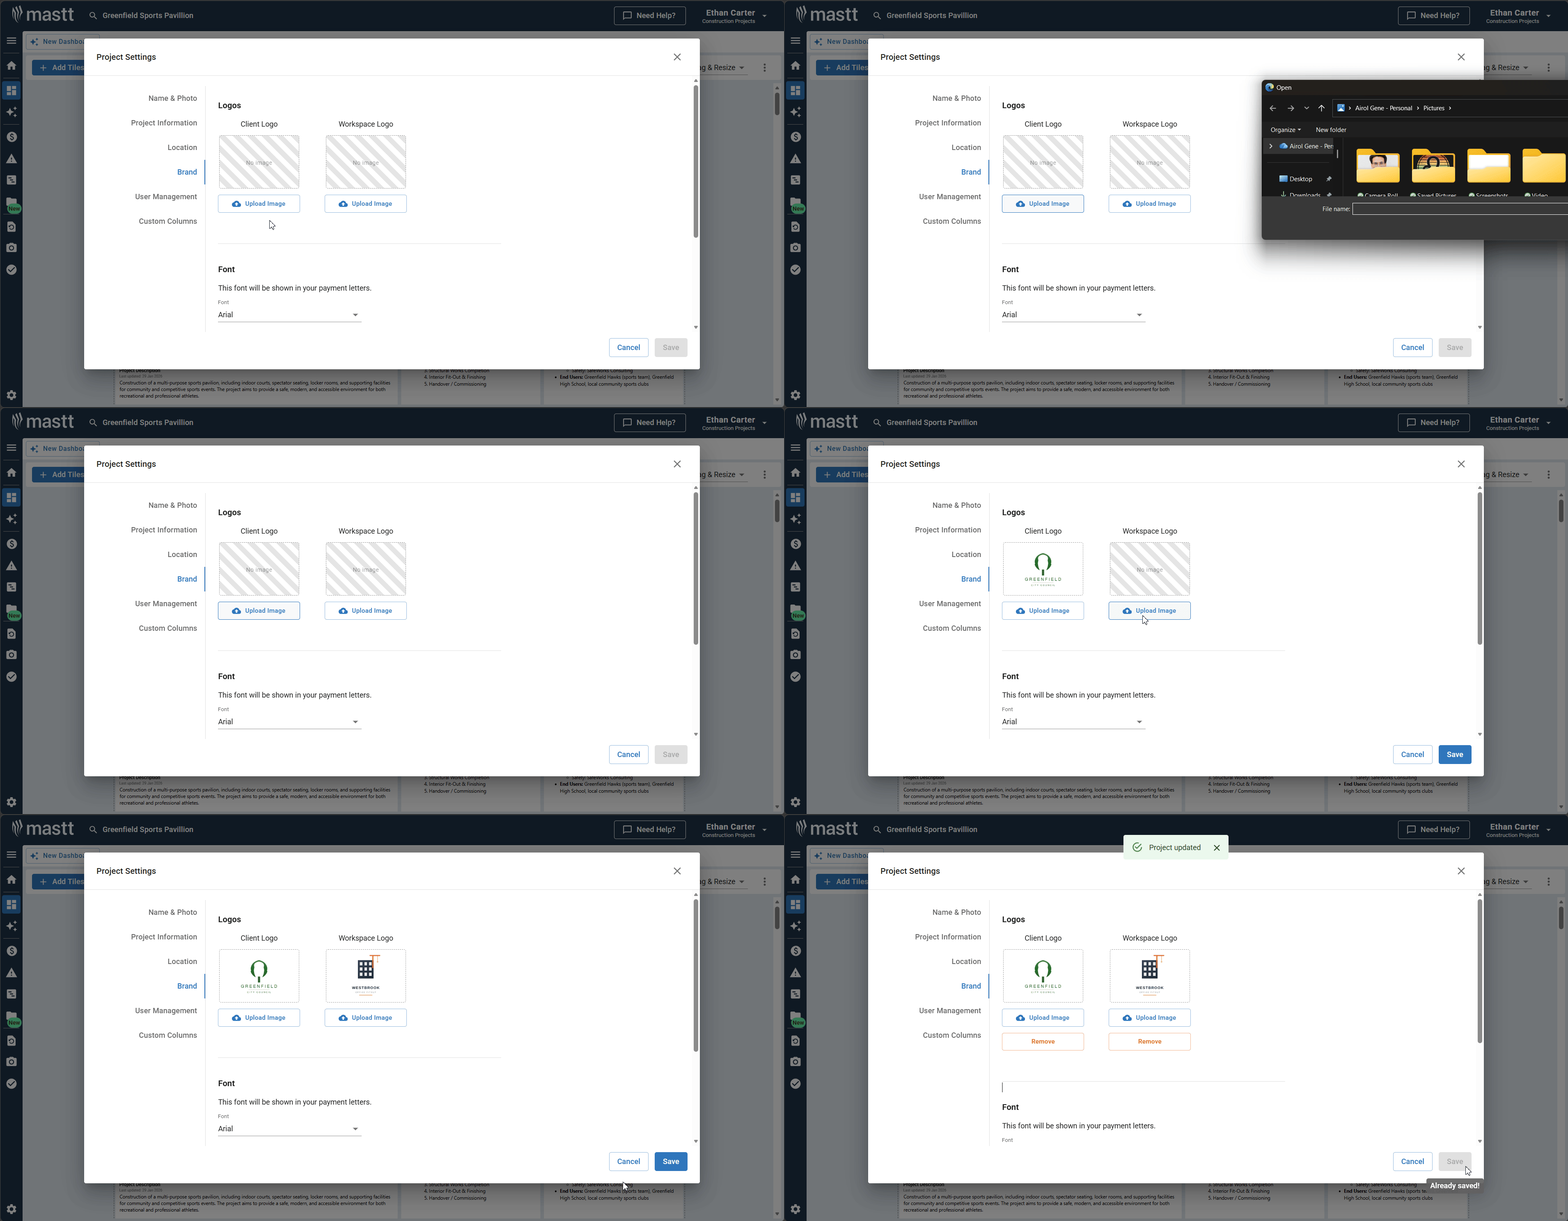
- Under Client Logo, click Upload Image.
- Select your logo file and confirm the upload.
- Click Save to apply. Your client logo now appears in the dashboard Client Logo tile and all project exports including payment certificates and variation approval PDFs.
Workspace Logo
- Under Workspace Logo, click Upload Image.
- Select your logo file and confirm the upload.
- Click Save to apply. Your workspace logo appears across all projects in the workspace.
For additional branding options including colours and fonts, see How to Customise Dashboard Branding.
Troubleshooting & FAQs
Q: What if I can't upload my logo?
Check your image is in JPG or PNG format and under the recommended file size. Contact your Workspace Admin if you need permissions.
Q: Why can't I see the Workspace Logo option?
Only Workspace Admins can upload workspace logos. Contact your Workspace Admin if you need this access.
Need Help?
Contact Mastt Support for additional assistance with logo uploads.