
Phases help you group related schedule activities into logical project stages such as Design, Procurement, or Construction. Use phases to organise your timeline, track progress by stage, and create clearer reports for stakeholders.
Before you start
- Have your project phases defined.
- Confirm you have permission to create and edit activities.
Add a new phase
- Click Schedule in the left navigation menu.
- Click the blue + Add Activity button in the top left corner to create a new activity, or click an existing activity to edit it. The Activity form opens on the right side of the screen.
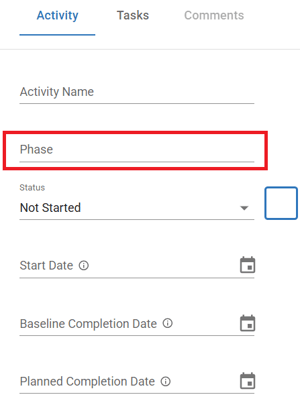
- Locate the Phase field in the Activity form.
- Type the phase name directly into the field (e.g., "Design Phase").
- Complete the remaining activity details (name, dates, etc.).
- Click the green Save button at the bottom of the form.
Your activity now appears in the schedule, grouped under its assigned phase in phase-based views.
Edit a phase
- Click the activity you want to update in the main schedule view. The Activity form opens on the right side.
- Click the Phase dropdown field.
- Select a different phase from the list, or type a new phase name.
- Click the green Save button at the bottom of the form.
Update phases in bulk
Use Bulk Edit to update phases for multiple activities at once.
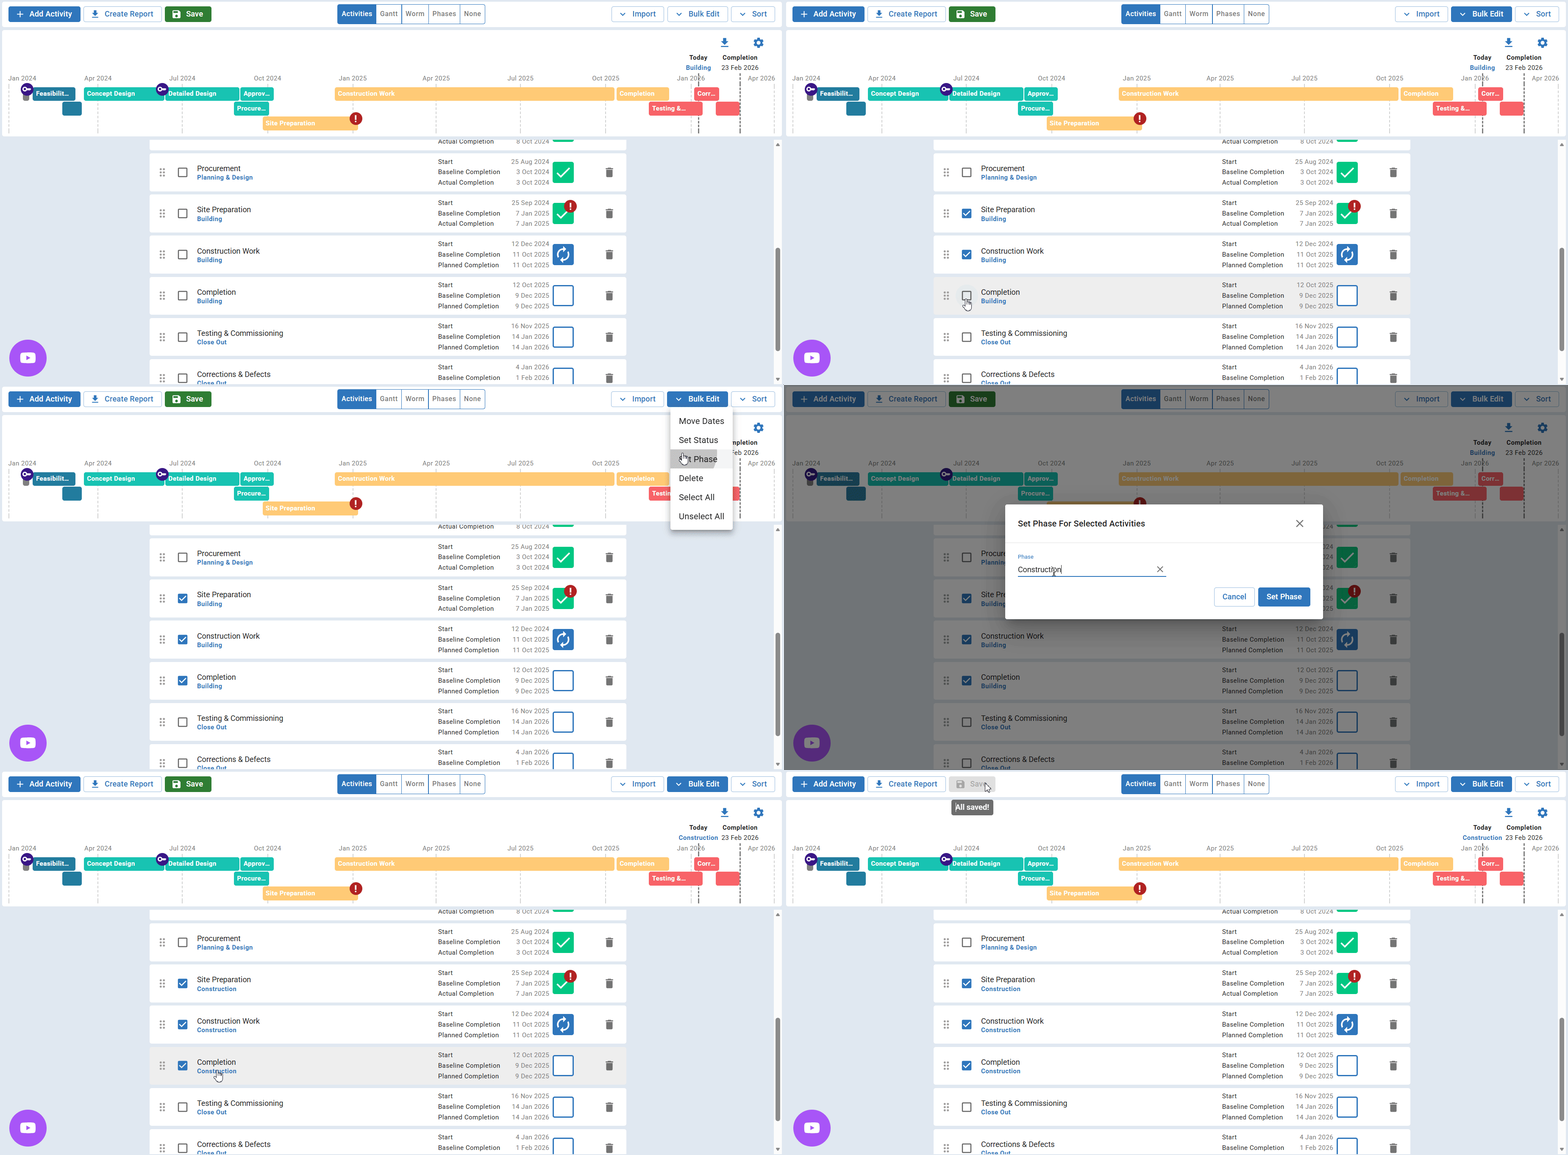
- Click the checkbox on the left side of each activity row you want to update. Selected rows display a blue highlight.
- Click the Bulk Edit button in the top right toolbar.
- Select Set Phase from the action dropdown menu.
- Choose an existing phase from the Phase dropdown, or type a new phase name to create one.
- Click the Set Phase button.
All selected activities are now assigned to the chosen phase.
Use phases in schedule views
View activities by phase
In the Schedule module, click the Phases tab in the visualisation menu at the top of the screen. Activities are grouped by their assigned phase, giving you a clear overview of your project.

Configure the Worm chart by phase
- Click the Worm tab in the visualisation menu.
- Click the gear icon in the top right corner of the chart area.
- Toggle One Row per Phase to ON.
- Click Done.
Your Worm chart now displays one row per phase, making it easy to track progress across project stages.
Filter dashboard tiles by phase
- Navigate to the Dashboard module.
- Click the Action button (three dots) on a schedule tile.
- Select Settings from the dropdown menu.
- Toggle specific phases on or off to customise what displays.
- Click Done to apply changes.
See phases on dashboards
Phases also appear in the Project Phases Gantt, which you can add to project and program dashboards.
Troubleshooting and FAQs
How do I rename an existing phase?
Phases can't be renamed directly. To change a phase name:
- Select all activities with the phase you want to change.
- Click Bulk Edit.
- Choose Set Phase.
- Type the new phase name and click Set Phase.
The new phase replaces the old one on all selected activities.
Why aren't my activities grouping correctly in the Phases view?
Check that each activity has a phase assigned. Activities without a phase won't appear in phase-based groupings.
Need help?
Contact Mastt Support for additional assistance with Activity Phases.