
 In this article you will learn how to:
- Create Mitigation
- Edit Mitigation
- Delete Mitigation
Mitigation of each Cause can be added easily against a given Cause. A Mitigation is sometimes called a 'Risk Control' and is a measure put in place to control the Cause.
For example: to mitigate against the risk of injuries onsite, possibly caused by falling objects, the consequence of which could be hospitalisation, an appropriate mitigation might be to ensure site workers wear helmets.
Create Mitigation
Step 1: To add or edit a Mitigation against a Cause, click on the three dots menu next to a Risk then select 'Add Cause' or 'View Cause'.
Step 2: Click the three dots menu next to a Cause then click 'View Mitigation'.

Edit Mitigation
Step 1: From the Hamburger Menu, navigate to Risk Module.
Within the Risk Register, click the three dots menu next to the Risk title of the Mitigation that you would like to edit then select "Edit Risk".

Step 2:
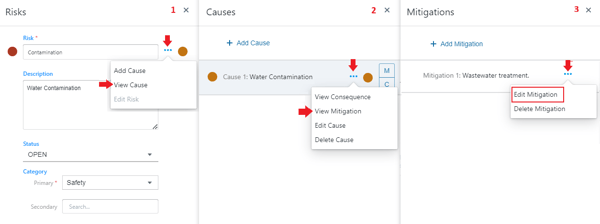
1. Click the three dots menu within the 'Risks' area then select 'View Cause'.
2. Within the 'Causes' area, click the three dots menu then select 'View Mitigation'.
3. Finally, within the Mitigation area, click the three dots menu then select 'Edit Mitigation'.
Step 3: Click Save when you're done!
Tip: You can also add a mitigation by clicking the '+ Add Mitigation' button.

Delete Mitigation
Follow the same steps as used in Edit Mitigation, then select 'Delete Mitigation'.
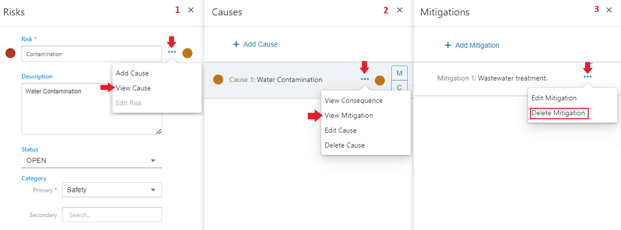
Click OK to delete Mitigation.
