
Mastt's Cash Flow feature lets you track project financial flows, manage budget performance over time, customize your cash flow display, export financial data, and control period access, all for accurate project cost tracking.
Before you start
Ensure you have existing contracts and forecasts configured in the Cost Module.
Open Cash Flow
- Navigate to your project dashboard.
- Click Cost in the left-hand navigation bar.
- Click Cash Flow in the top navigation.
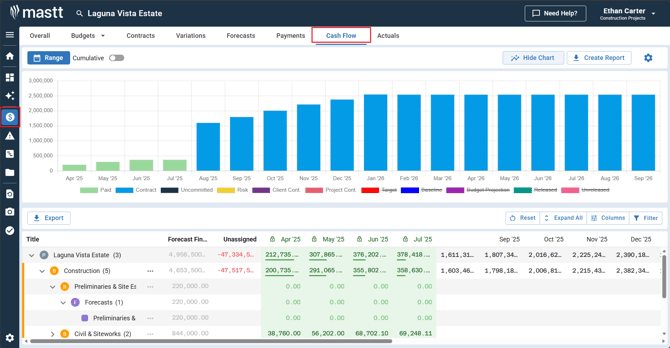
Configure view settings
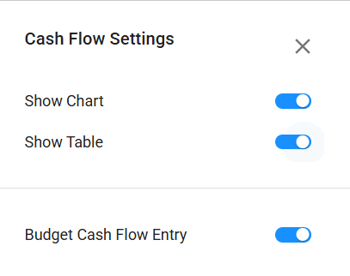
- Click the Settings button (cog icon) in the upper right corner of the cash flow page.
- Adjust the settings in the table below.
| Setting | What it does |
|---|---|
| Show Chart | The chart is hidden by default. Turn this on, or click Show Chart on the Cash Flow page, to display it. |
| Show Table | Shows or hides the cash flow table. |
| Budget Cash Flow Entry | Toggle ON to enable budget-level cash flow entry. When OFF, you can enter cash flow at the object level (contracts, forecasts, risks). See How to Edit Budget and Object Level Cash Flow for detailed instructions. A budget uses either budget-level or object-level cash flow entry, not both. |
| Target and Baseline | Select Line or Bar to show target and baseline data, or None to hide it. |
| Cumulative Overlay | Toggle on or off to show cumulative values. You can also toggle Cumulative next to the range selector to show data from project start or range start. |
| Schedule | Toggle on to flag when a schedule activity is scheduled to end. |
| Decimal Places | Set the number of decimal places shown for your reporting requirements. |
| Denomination | Set the denomination for your reporting requirements. The default is None, which shows the whole number. |
Set up your target and baseline
Use Target to record your goal values and Baseline to capture your original forecast. Both are configured the same way.
- In the Settings panel, locate Target or Baseline and select your preferred display format: Line or Bar.
- On your cash flow table, click the Action button next to your target or baseline.
- Select Edit Target Cash Flow or Edit Baseline Cash Flow.
- Enter your values for each period.
- Click Confirm to save and display it on your cash flow chart.
Set date ranges
- Click the blue Range selector icon in the upper left corner of the cash flow page.
- Choose from the preset ranges.
| Preset | What it shows |
|---|---|
| Today | Current date focus |
| Calendar Year | Current calendar year |
| Prev FY | Previous fiscal year |
| Current FY | Current fiscal year |
| Next FY | Next fiscal year |
| All Data | Complete project timeline |
Manage column display
Use the Columns button and the Filter button next to it to tailor your cash flow table, or hover over any column header to access column settings.
| Option | What it does |
|---|---|
| Pin columns | Keep important columns visible while scrolling |
| Sort data | Organize information by column values |
| Filter | Click Filter (next to Columns) to narrow down displayed data |
| Show or hide columns | Click Columns to customize which columns appear |
| Adjust column width | Click and drag the edge of a column to resize it |
| Reset | Restore default settings |
| Expand or collapse all | Expand or collapse all sections |
Use the chart legend
Click a legend item on the chart to show or hide that data.
Close and reopen periods
Why close off a month? Close off a month once all of its payments have been recorded. Closing the month replaces the forecast with actual amounts, so the chart and table show what was actually spent, and only payments with a Paid status are included. It also locks the month: its cash flow can no longer be changed, new payments cannot be added to it, and payments cannot be moved out of it.
Warning: Only a Project Admin or Workspace Admin can re-open a closed month or edit or delete payments in it.
- Locate the period you want to manage in the cash flow display.
- Click Close off on the month's column header.
- Select Yes to confirm the period closure.
- Use Re-open to unlock a closed month. Re-opening returns the month to forecast amounts.
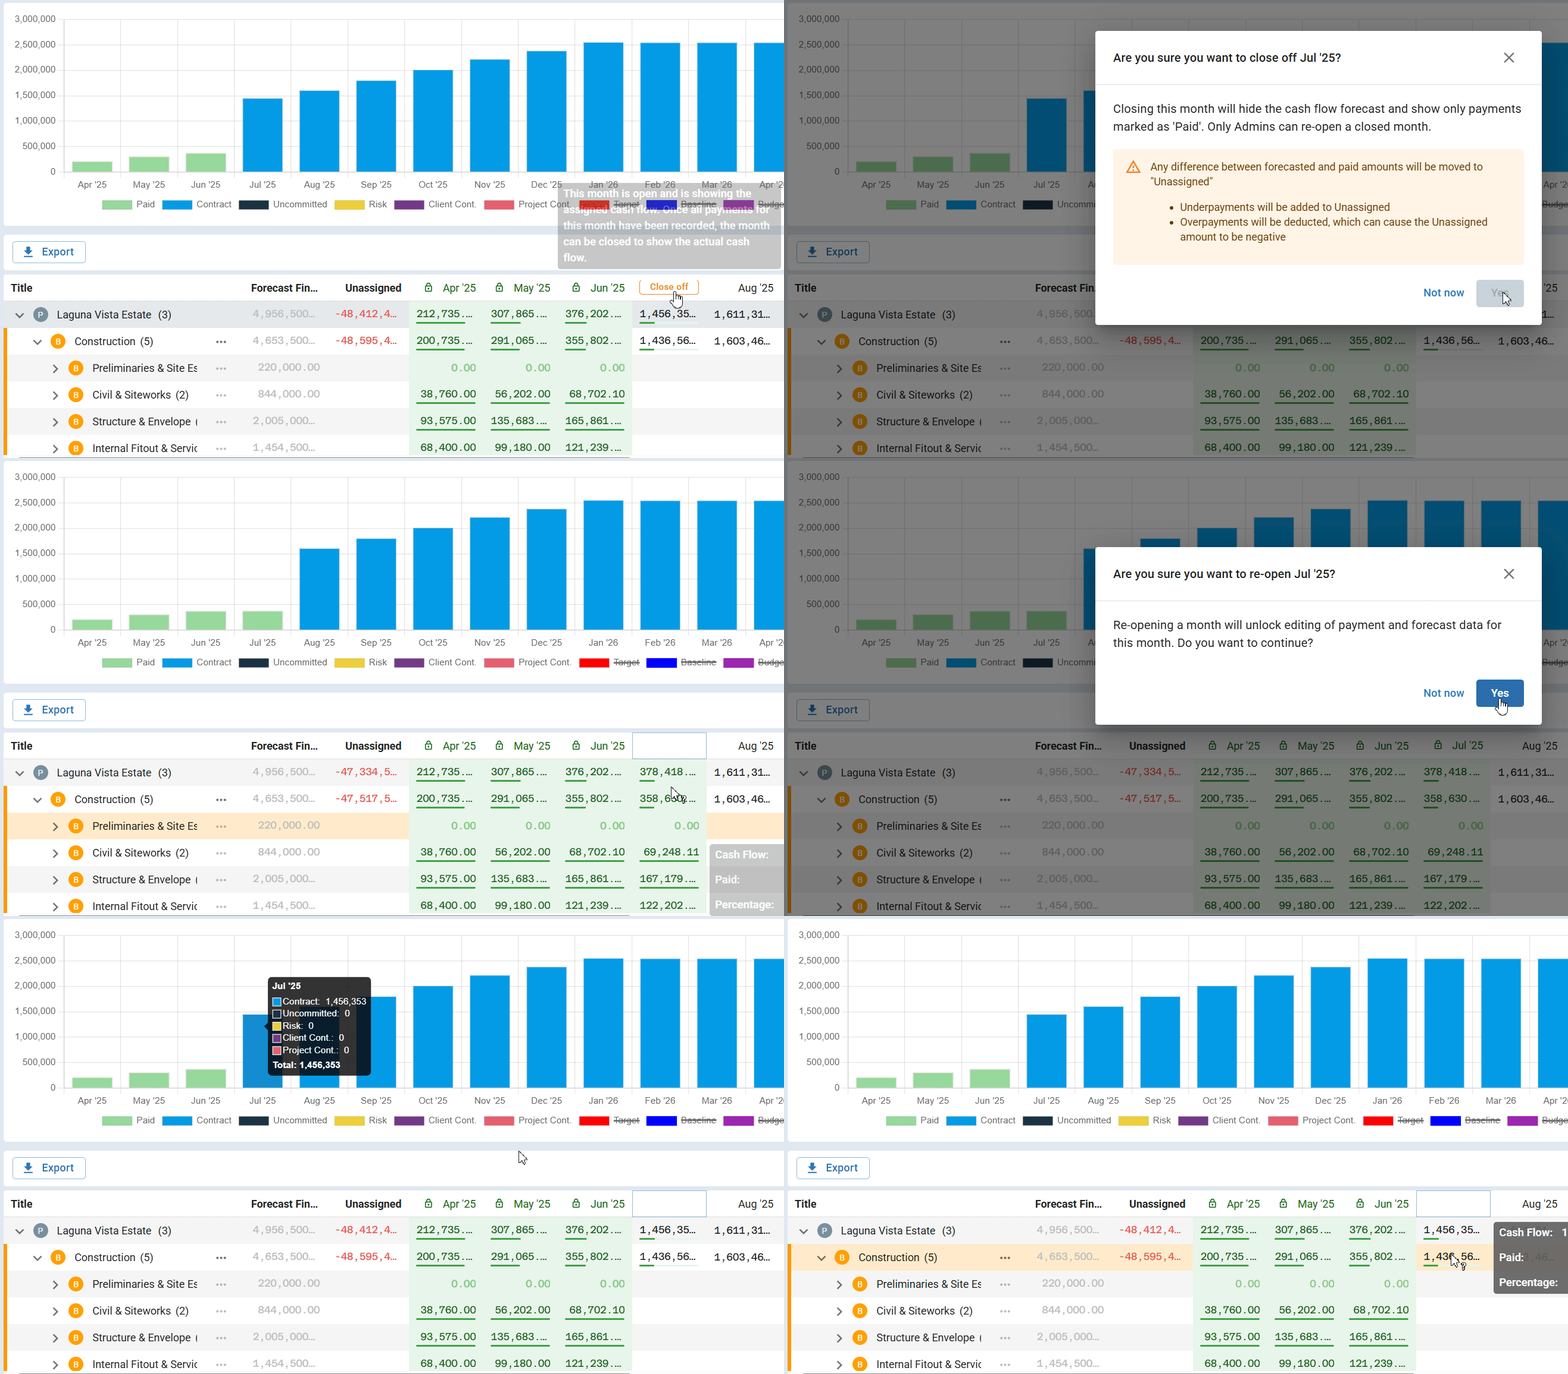
Tip: Any user can close off a month. Ensure all payments are recorded before closing a period, as this locks the data from further edits. Closed periods maintain data integrity for financial reporting.
Export cash flow data
- Click the Export icon on the left side of the cash flow page.
- Choose your export option.
| Option | What it exports |
|---|---|
| Current View | Data with all applied filters |
| All Data | The complete dataset regardless of filters |
Generate cash flow reports
- Click the Create Report icon in the upper right corner of your cash flow page. Mastt creates a new dashboard containing a cash flow report, which you can customize.
Troubleshooting and FAQs
What if cash flow data is not displaying in the chart or table?
The chart is hidden by default. Click Show Chart, or turn on Show Chart and Show Table in Cash Flow Settings. Check that you have budget-level or object-level cash flow configured (see How to Edit Budget and Object Level Cash Flow). Also verify that your date range includes periods with actual cash flow data.
Why can't I reopen a period?
Only administrators can reopen cash flow periods. Check your user permissions or contact your project administrator.
What if my export shows incomplete data?
If using "Current View" export, check your applied filters. Switch to "All Data" export option to capture the complete dataset regardless of current display filters.
Need help?
Contact Mastt Support for additional assistance with cash flow management.