
Set up your contracts in Mastt so it can automatically generate payment certificates, schedules and recommendations. You can use AI to extract contract details from a PDF, or enter them manually for complete control.
Before you start
- You need access to the project.
- Have your contract PDF ready (for AI Upload) or your contract details available (for manual entry).
Open the Add Contract form
- Click the Cost module in the left navigation bar.
- Open the form in one of three ways:
- From the Overall page, click the blue + Add button, then select + Add Contract.
- Find the budget you want to add a contract to, click the Action button next to it, and select + Add Contract.
- Click Contracts in the top navigation to view your Contract register, then select Add Your First Contract in the center (only visible if you have no contracts) or click the blue + Add Contract button in the upper left corner.
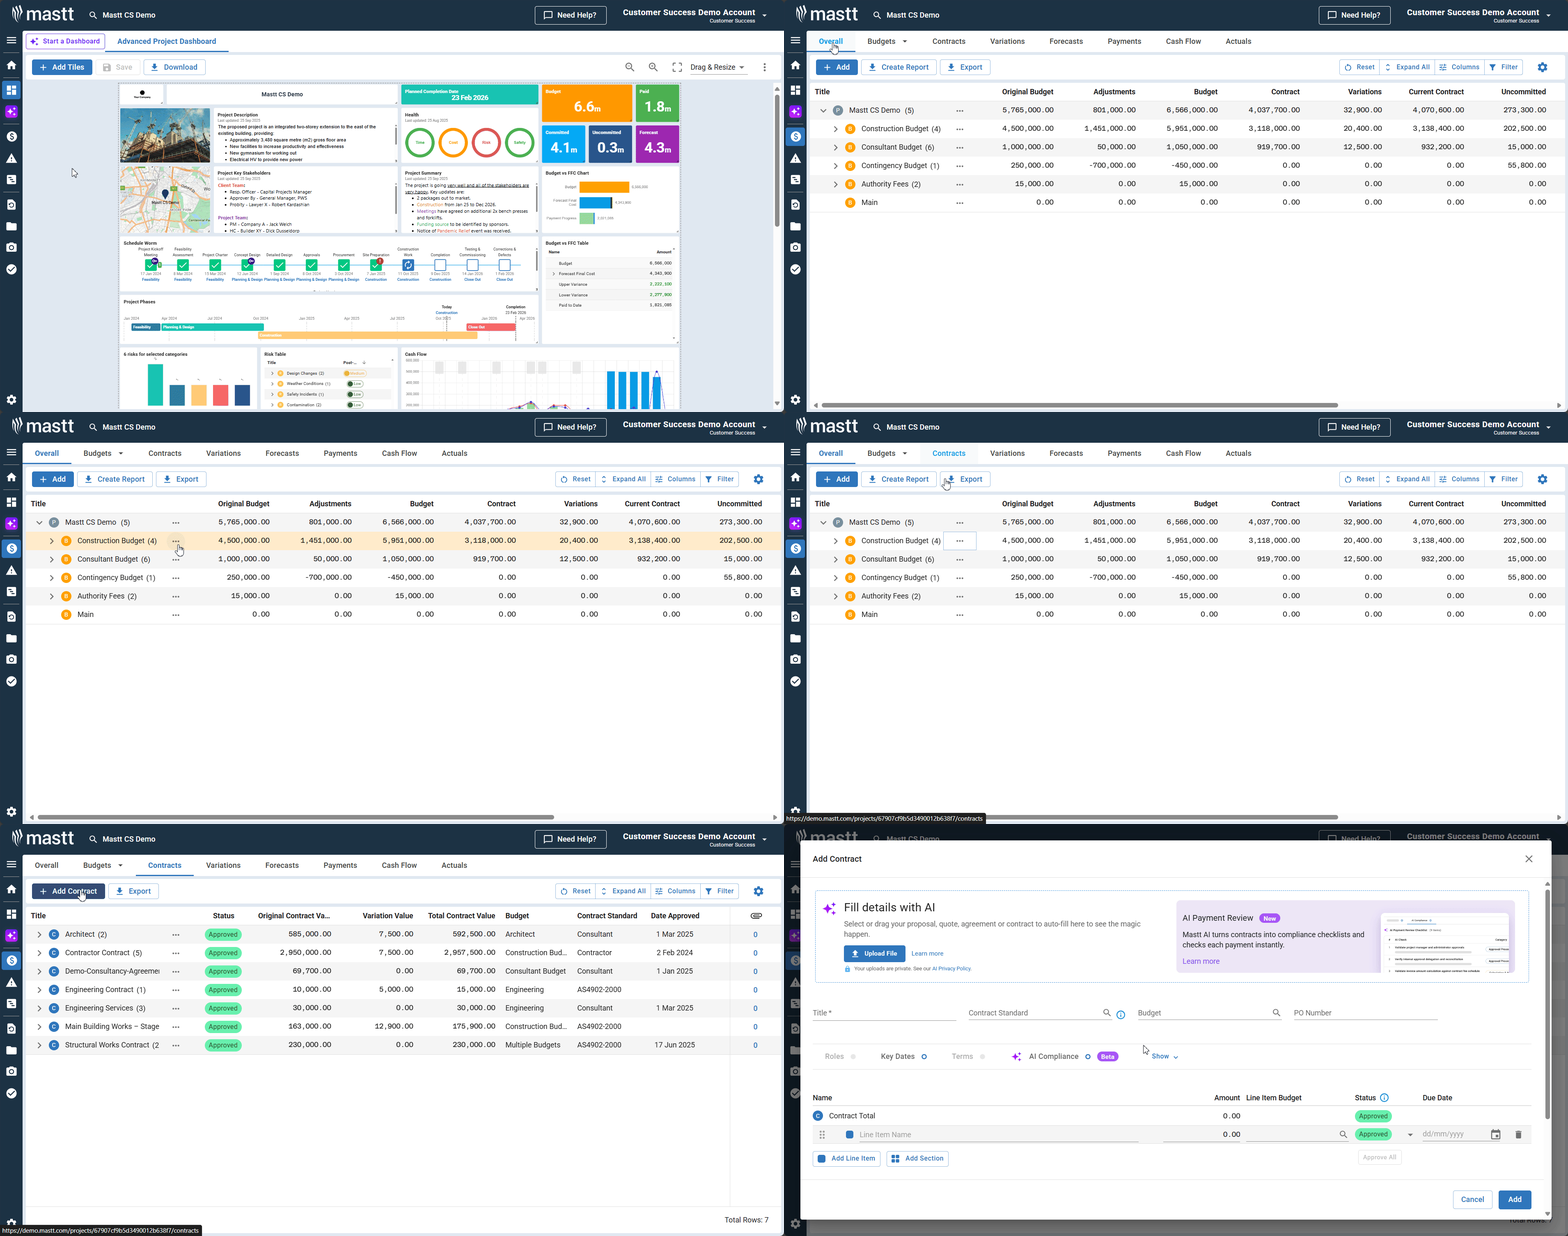
The Add Contract form opens, ready for your contract data.
Note: The Contract Register is the main list view where you can also see all your contracts, add new ones, and manage existing entries.
Choose how to set up the contract
Once you're in the form, choose one of two options.
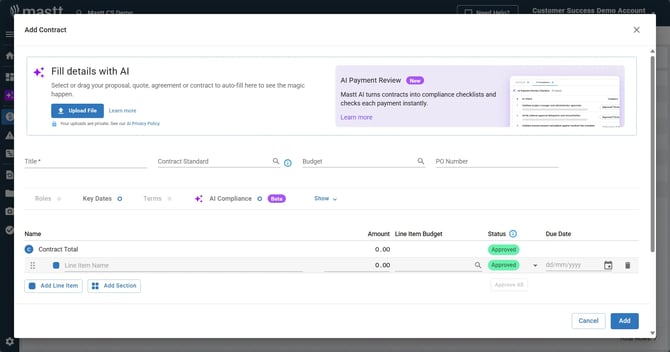
| Option | When to use it |
|---|---|
| Set Up Contract via AI Upload | The fastest method if you have a PDF of your contract. AI fills in your contract details and flags important clauses to track. |
| Set Up Contract with Manual Data Entry | You want to enter the contract details yourself. |
Set up a contract via AI Upload
Upload your contract file
- Click Upload File, or drag your document onto the Fill details with AI box.
- Select the contract PDF from your device.
Note: Your uploads are private. See our AI Privacy Policy.
Review the extracted data
Mastt AI automatically extracts key contract information, including Contract Standard, Roles, Key Dates, Payment and Change Terms, AI Compliance requirements, and line items with amounts. See How to Use AI Compliance for Contracts and Payments for the compliance requirements.
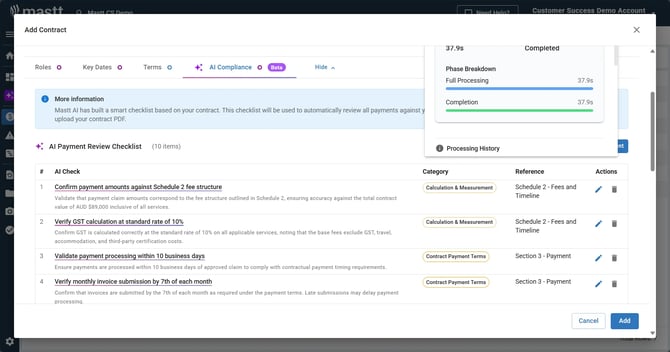
Adjust fields if needed
- Click into any field to edit the extracted information.
- Verify that dates, roles and amounts are correct.
- Make any necessary corrections before you continue.
Set up a contract with Manual Data Entry
Enter basic contract details
- Fill in the contract title.
- Select the associated budget.
- Add the PO Number (if applicable).
Configure roles
- Select the correct Contract Standard from the dropdown menu.
- Navigate to the Roles tab.
- Complete the required role fields based on your contract standard.
- Use the toggle on the role that should sign your letters to show it as Authorized by on letters. The role names depend on the contract standard selected.
Note: If your Contract Standard is not listed, contact Mastt Support for assistance.
Note: When one role is toggled on, the toggle option for other roles will be grayed out.
Set key dates
- Open the Key Dates tab.
- Enter Date Approved.
- Enter Contract Completion Date (this will enable EOT Change Orders).
Configure payment and change terms
- Open the Terms tab.
- Review the Payment Terms:
Field What it does Payment Clause Appears in the Payment Certificate Contract Tax percentage The default tax rate for the contract's line items - Review the Change Terms. The Change Clause auto-populates on the Change Approval letter.
Add contract line items
Enter the following for each line item.
| Field | What to enter |
|---|---|
| Line item name | The name of the line item |
| Amount | The line item amount |
| Line item budget | The relevant budget, if your contract applies to multiple budgets |
| Status | The line item status. Pending line items count as uncommitted cost and stay out of payment certificates and change order options. |
| Due date | The due date (if applicable) |
| Tax Rate | Defaults to the Contract Tax Rate. You can change it if you have a mixed tax contract or a tax-free line item. |
Add supporting information and finish
- Add a comment in the Notes field (only visible to users within this project).
- Upload attachments if needed (documents are automatically attached when you use AI upload).
- Review all contract details for accuracy.
- Click Add to create the contract.
Your contract is now configured to generate professional payment documentation automatically, saving time and ensuring consistency across all payment letters.
Add and process payments
Once your contract is configured, refer to How to Add Payments to complete your payment entries.
Download individual payment letters
- Go to the Payments tab in the Cost module.
- Find the payment you want to process.
- Click the Action button (three dots) next to the payment.
- Select Payment Certificate, Final Payment Certificate, Payment Schedule, Payment Recommendation or Payment Report.
- In the pop-up that shows your uploaded PDF attachments, select which attachments to include by clicking the checkbox next to each file.
- Reorder attachments by dragging them into the right pane.
- Click Continue to download the payment letter with the selected attachments.
Bulk download multiple certificates
- Go to the Payment register.
- Select the checkboxes next to the payments you want to include.
- Click the Letters button with the arrow down at the top of the page.
- Choose the letter type: Final Payment Certificate, Payment Certificate, Payment Schedule or Payment Recommendation.
- Review the list of selected payments in the pop-up. Each payment is listed as Pending.
- Click each payment to view its attachments, and select which attachments to include by clicking the checkbox next to each file.
- Click Attach All at the bottom of the box to include all documents, or select Skip attachments for this Payment Letter if you don't want to attach any.
- Click Review to check the list.
- Click Generate Payment Letters to download the ZIP file.
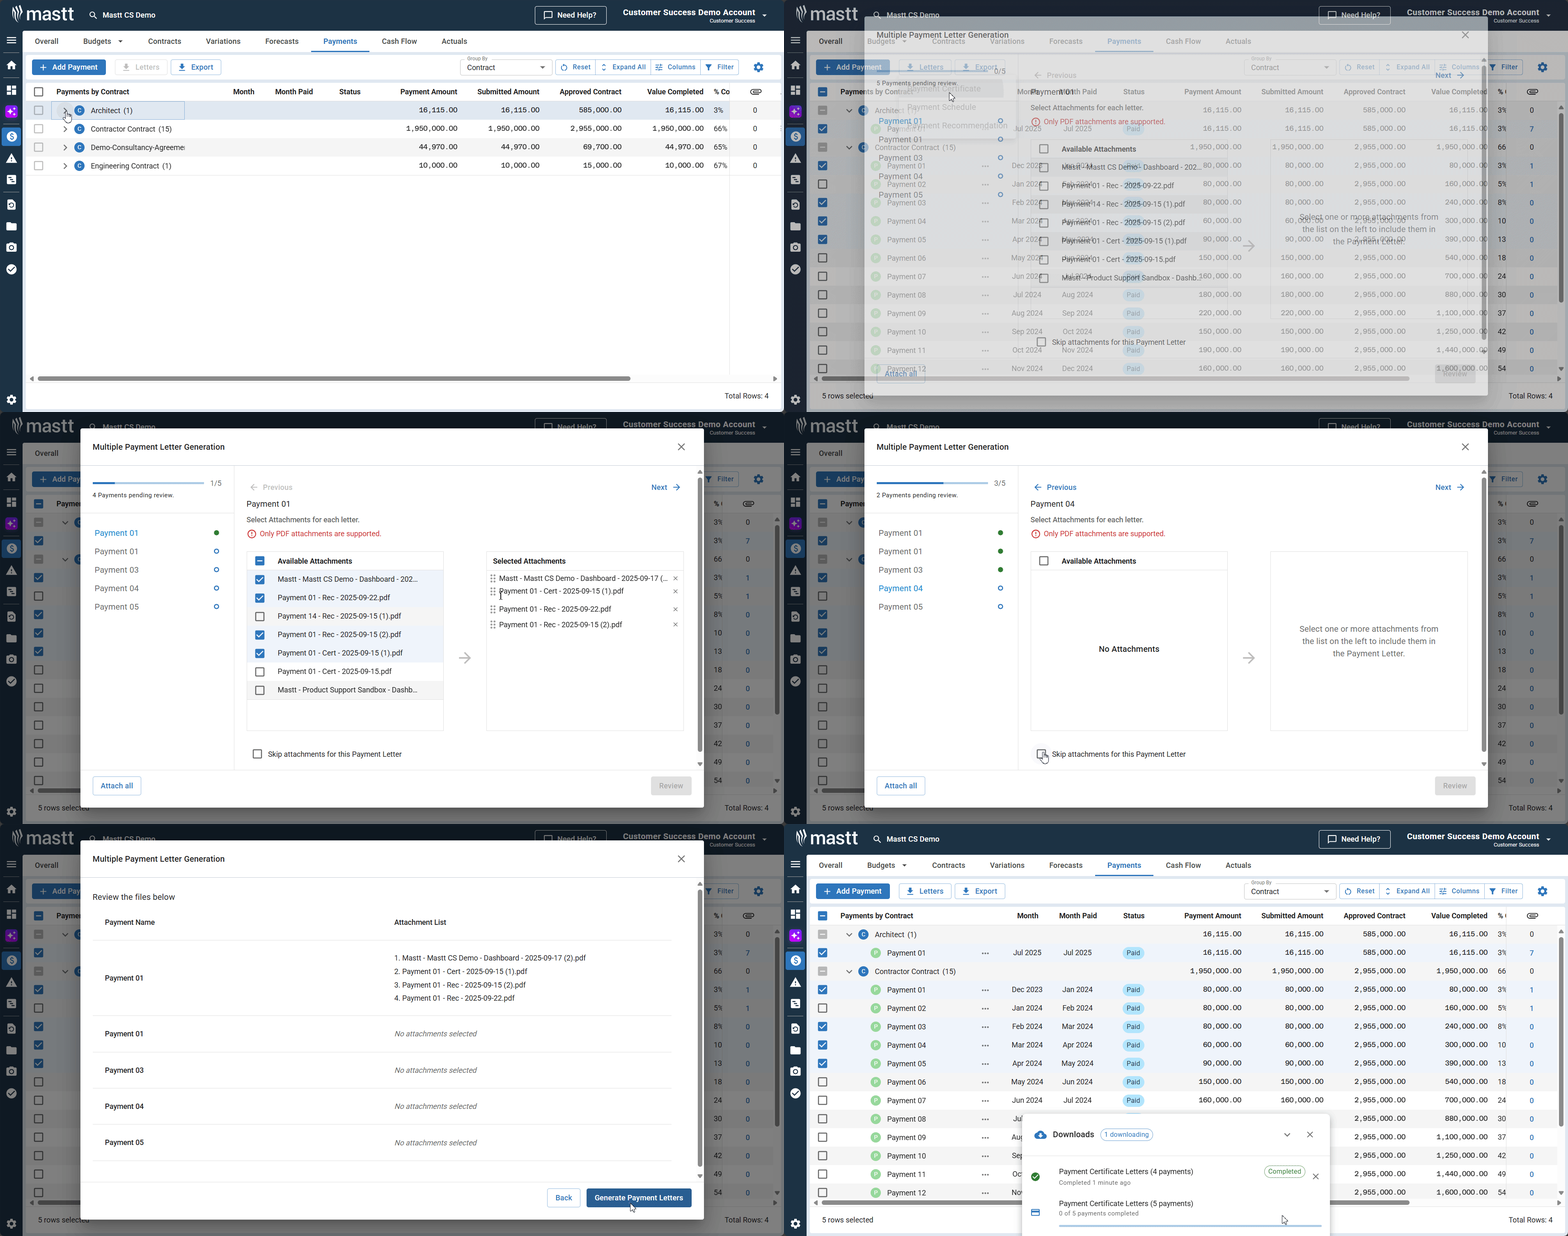
Note: Skip attachments for this Payment Letter is set per payment, so tick it for each payment you want to send without attachments.
Note: Mastt will generate a .zip file containing all selected letters with any bulk attachments included.
Troubleshooting and FAQs
What if the AI doesn't extract all my contract details correctly?
Click into any field to edit the information. The AI provides a starting point, but you have full control to adjust any extracted data before saving.
Why do I need to select a Contract Standard?
The Contract Standard determines which roles appear in your contract setup and ensures payment letters comply with the correct legal and industry requirements for your region and contract type.
What if I need to change contract details after saving?
Navigate to your contract in the Contract register, click the Action button (three dots), and select Edit Contract to modify any details. Changes will apply to future payment letters.
Need help?
Contact Mastt Support for additional assistance with contract configuration and payment letter generation.