Dashboards display key metrics at the project and program levels, giving you real-time visibility into cost, risk, and schedule performance across your construction projects.
Before You Start
- Access to the project or program
If you're a new user, the Homepage guides you through your initial project setup — including a shortcut to the AI Dashboard Creator. See Set Up Your First Free Project for details.
Creating Your Dashboard
Navigate to the Dashboard Module
- Go to your project or program — you'll land on the Dashboard page by default.
- Click New Dashboard in the upper left corner.
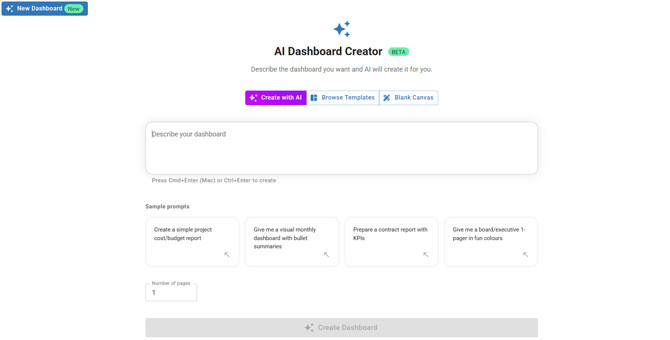
Option 1: AI Dashboard Creator
Click Create with AI and either describe your dashboard or choose from the sample prompts to automatically generate it.
See How to Use the AI Dashboard Creator for details.
Option 2: Template Library
- Click Browse Template and choose from All, My Workspace, or Mastt Templates.
- Click View Template to preview, then Use Template to apply it.
Option 3: Start from Scratch
Click Blank Canvas and add tiles manually using the Add Tiles button.
Save frequently used layouts as workspace templates. See How to Create and Use a Custom Dashboard Template for details.
Customising Your Dashboard
Add Tiles
- Click + Add Tiles to open the Tile Library.
- Browse tiles by category using the left panel.
- Hover over a tile and click + Add Tile. You can add multiple tiles as needed.
- Click X to close the Tile Library and return to your dashboard.

Move and Resize Tiles
Drag tiles to reposition. Drag tile edges to resize.
Edit Tiles
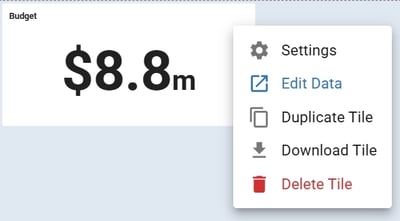
- Hover over a tile and click the Action button.
- Select from:
- Settings — Adjust the tile's display options such as custom title, image, legends, dates, labels, and more. For newer tiles, this opens a settings panel on the right side of your screen with a live preview. For other tiles, settings open in a pop-up dialogue.
- Edit Data — Edit the data directly from the module (opens a new tab to your selected module)
- Duplicate Tile — Create a copy of the tile
- Download — Export the tile data
- Delete — Delete the tile from your dashboard
Dashboard Settings and Tools
Access Dashboard Settings
- Click the Action button in the top right corner.
- Select from: Dashboard Settings, Rename, Duplicate, Save as Template or Delete Dashboard
Dashboard Tools
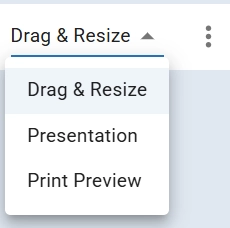
The toolbar in the top right corner includes:
- Drag and Resize – Rearrange tiles
- Presentation – Lock layout for presenting
- Print Preview – Prepare for PDF or print
Share Your Dashboard
- Click the Share button in the top right corner.
- Select from:
- Share Link – Generate a shareable link (see How to Share a Dashboard Link for details)
- Download PDF – Export your dashboard as a PDF file
Troubleshooting & FAQ
Q: Can I have multiple dashboards per project?
Yes — create as many dashboards as you need. Each can focus on different metrics or audiences.
Q: Can I upload multiple contracts during onboarding?
Yes — each contract is processed and set to Approved status automatically.
Need Help?
Contact Mastt Support for additional assistance with dashboards.