
Cover pages help you create professional-looking reports and presentations directly within your Dashboard. Use this feature when you need to add branded headers, project summaries, or formatted introductions to your dashboard reports.
Note: Dashboard tile layout changes (moving, resizing, adding, and removing tiles) are autosaved. However, edits made inside tiles, such as rich text content, fonts, and colours, must be saved manually by clicking Save.
Before you start
- Have any logos, images, or text you want to include ready.
- If you need to set up brand assets first, see How to Customise Dashboard Branding.
Create a new dashboard
- Navigate to your project or program Dashboard.
- Click New Dashboard in the top left corner.
- Select Blank Canvas.
- Rename your dashboard by clicking the Action menu (three dots) and selecting Rename Dashboard.
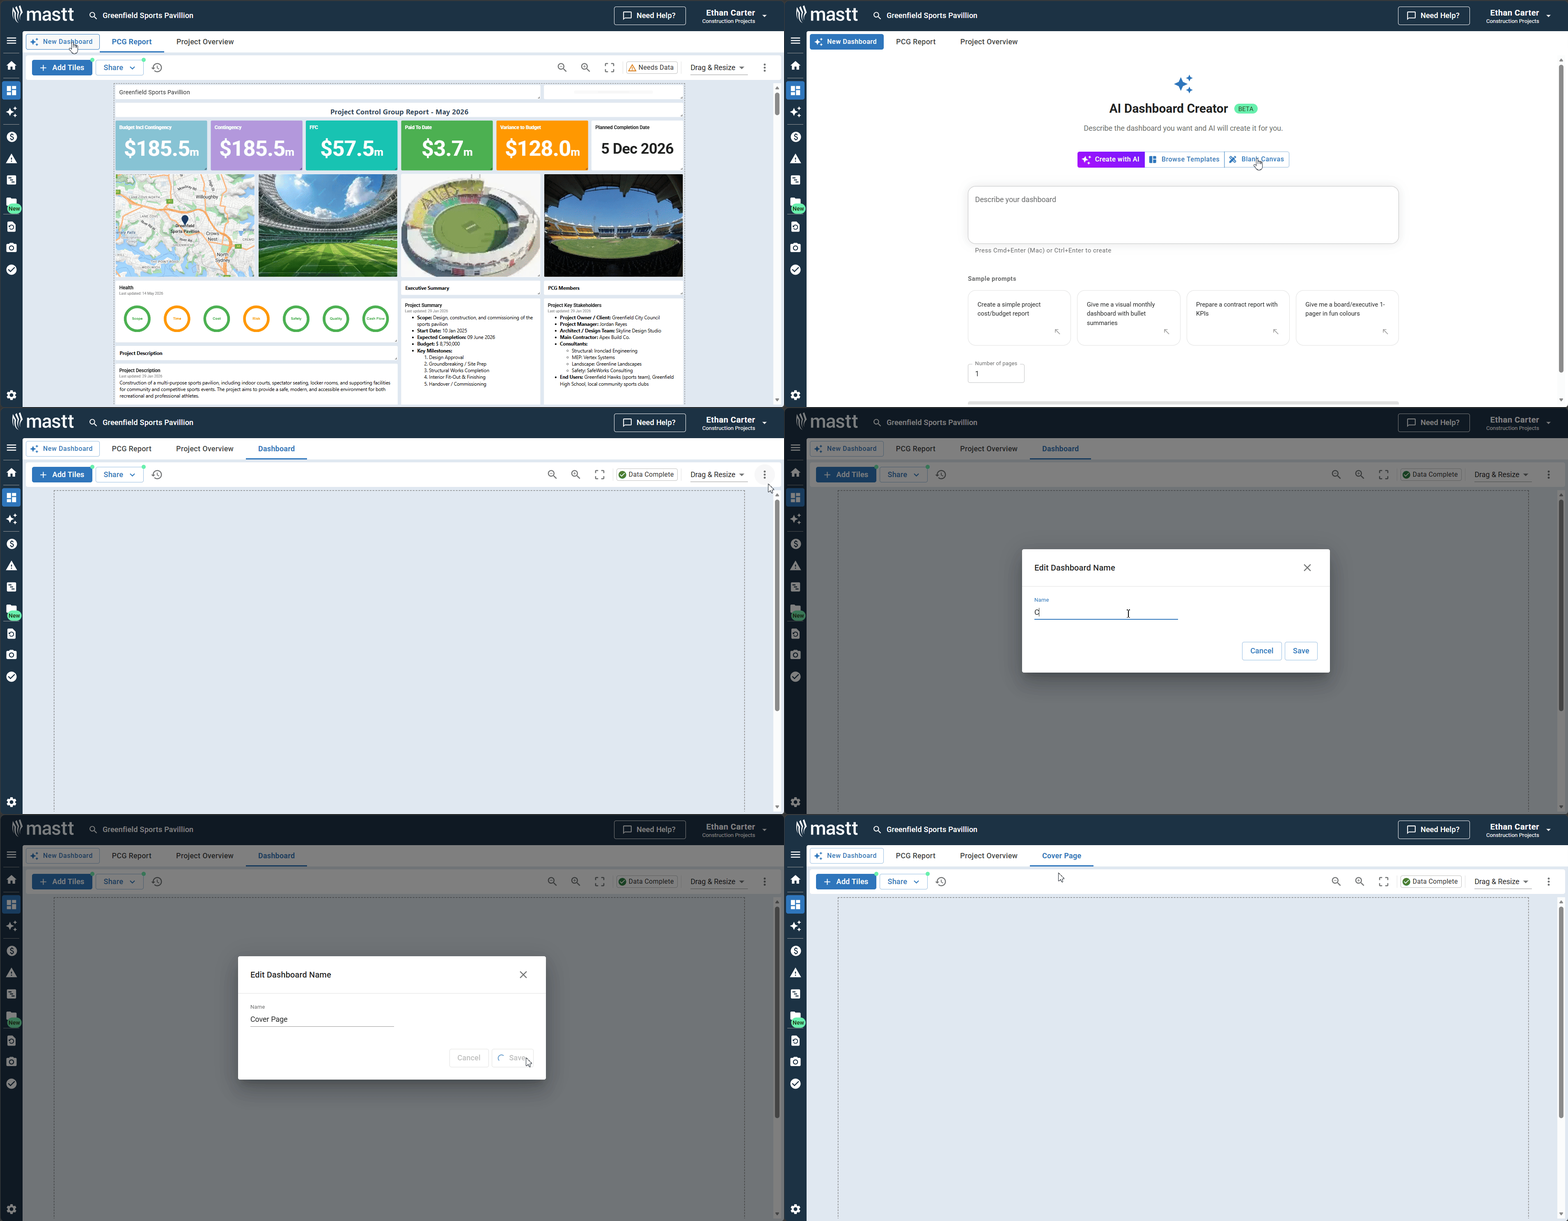
Add a custom text box
- Click + Add Tiles in the upper left corner.
- Select Custom Text Box from the tile library.
- Click X to close the tile library.
- Resize the text box to fill the full dashboard area.
Format your content
- Click the Action button on the Custom Text Box tile.
- Select Edit Text.
- Use the rich text editor to build your cover page:
- Click the table icon to add a table with your desired columns and rows.
- Add your content, such as company name, project details, logos, or contact information.
- Change background colours using the colour picker.
- Format text with the available styling tools (headings, bold, alignment).
- Click Save when your cover page is complete.
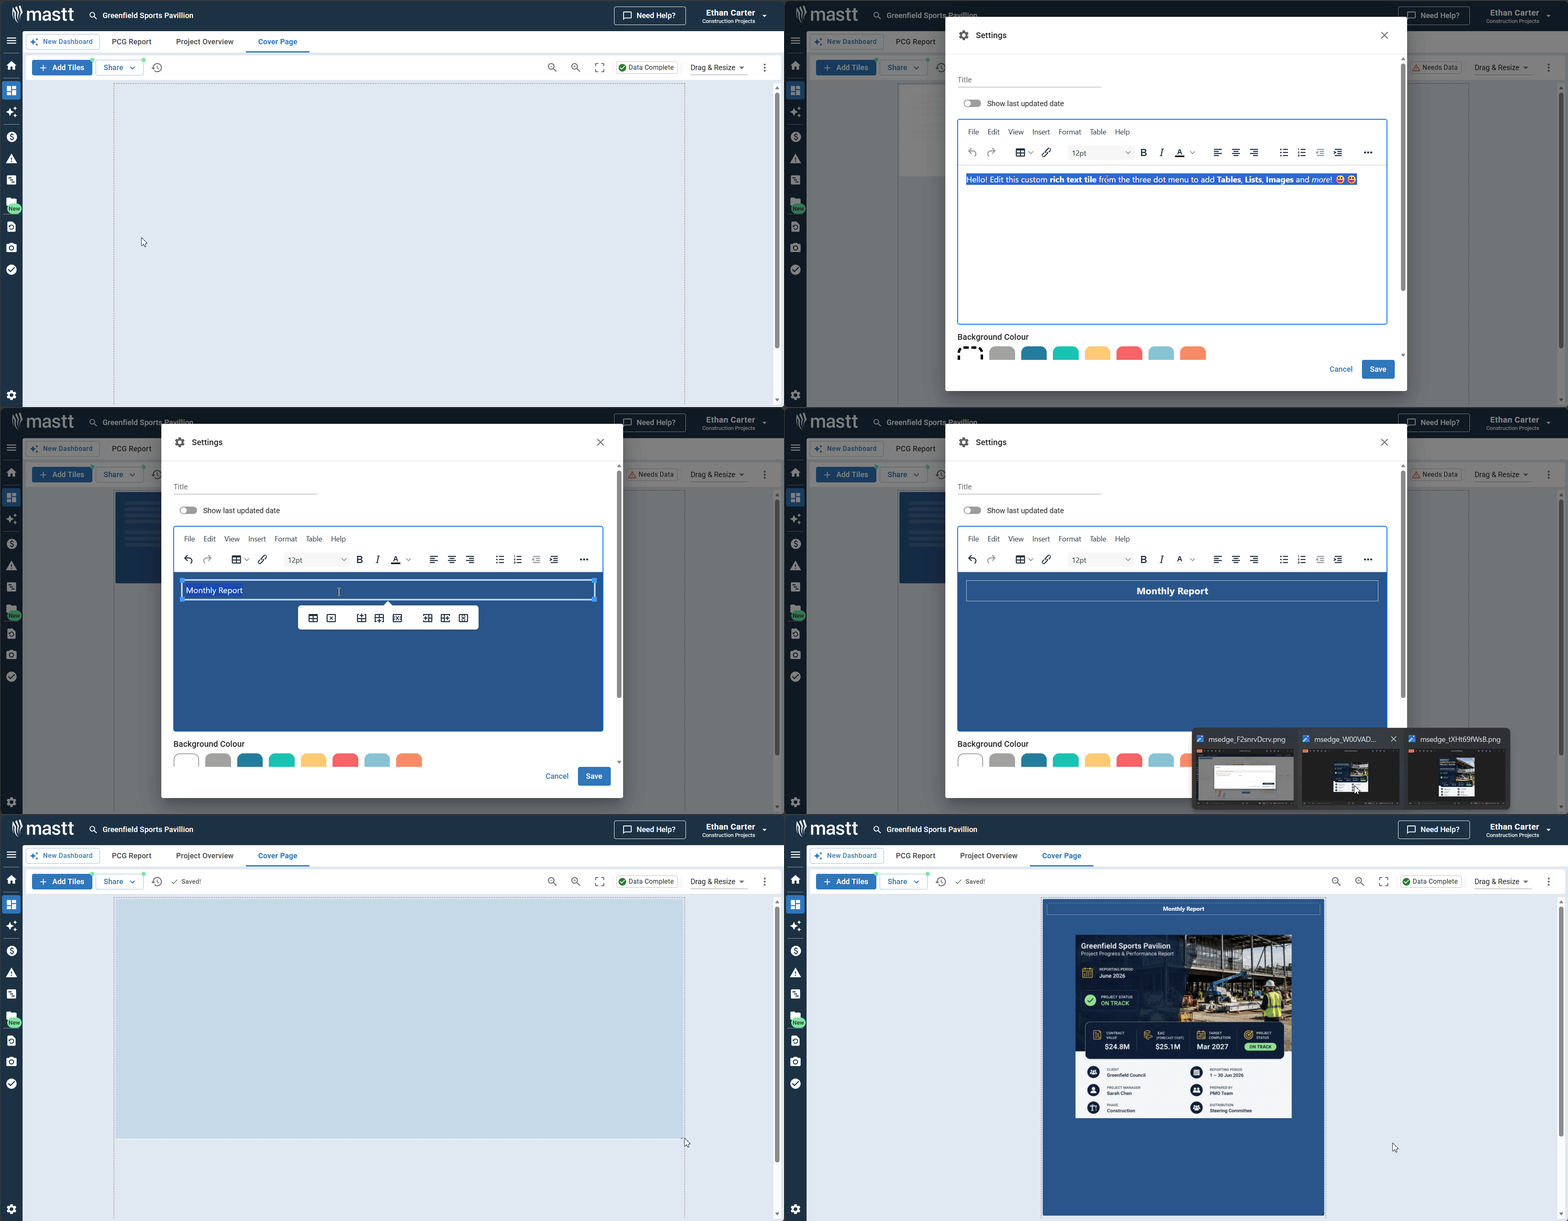
Tip: You can also paste a screenshot of an existing cover page from PowerPoint or Word directly into the text box, then resize and position it as needed.
Adjust print settings (optional)
- Click the Action menu (three dots) on the dashboard.
- Select Settings.
- Under Print Orientation, choose Portrait or Landscape.
- Click Done.
Tip: For detailed report formatting options, see How to Set Dashboard Reports to Portrait.
Save as a template
To reuse this cover page design for future projects, save it as a custom template. This allows you to quickly apply the same branding and layout to new dashboards.
Tip: See How to Create and Use Custom Dashboard Templates for details.
Troubleshooting and FAQs
| Question | Answer |
|---|---|
| Why don't my colours match exactly? | Double-check your RGB values and use the custom colour selector rather than preset options. |
| Why does my logo appear pixelated? | Upload a higher resolution image file (minimum 300px width recommended). |
Need help?
Contact Mastt Support for additional assistance with dashboard branding.