
Customise the colour scheme of all your variation letters and payment letters so they match your brand. You can set brand colours at the Workspace level (applies to all projects) or the Project level (for individual projects).
Before you start
- Workspace level branding requires Workspace Admin permissions.
- Project level branding requires Project Admin permissions or higher.
- Have your brand hex codes ready if you want exact colour matching.
- Workspace level colours apply to all existing and new projects unless overridden at the project level.
Choose a level
| Level | Applies to | Best for |
|---|---|---|
| Workspace level | All projects in the workspace that use the default | The most efficient way to keep branding consistent across all your projects |
| Project level | One project only | A project that needs different colours from your workspace default, for example when a client has their own brand guidelines |
Set brand colours at workspace level
Open workspace branding settings
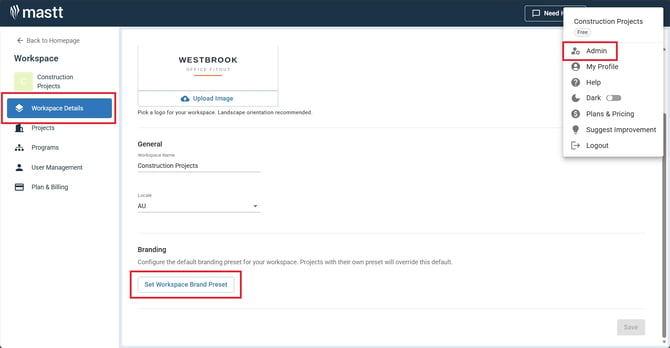
- From the homepage, click your name in the top right corner.
- Select Admin from the dropdown menu.
- Click Workspace Details in the left navigation sidebar.
- Scroll down to the Branding section.
- Click Set Workspace Brand Preset.
The Brand Colours modal opens with preset options and fine-tune controls.
Warning: Setting a workspace preset applies the branding to all existing projects that use the workspace default. Projects with their own branding keep it. Make sure this is what you want before saving.
Apply a preset or fine-tune colours
To use a preset:
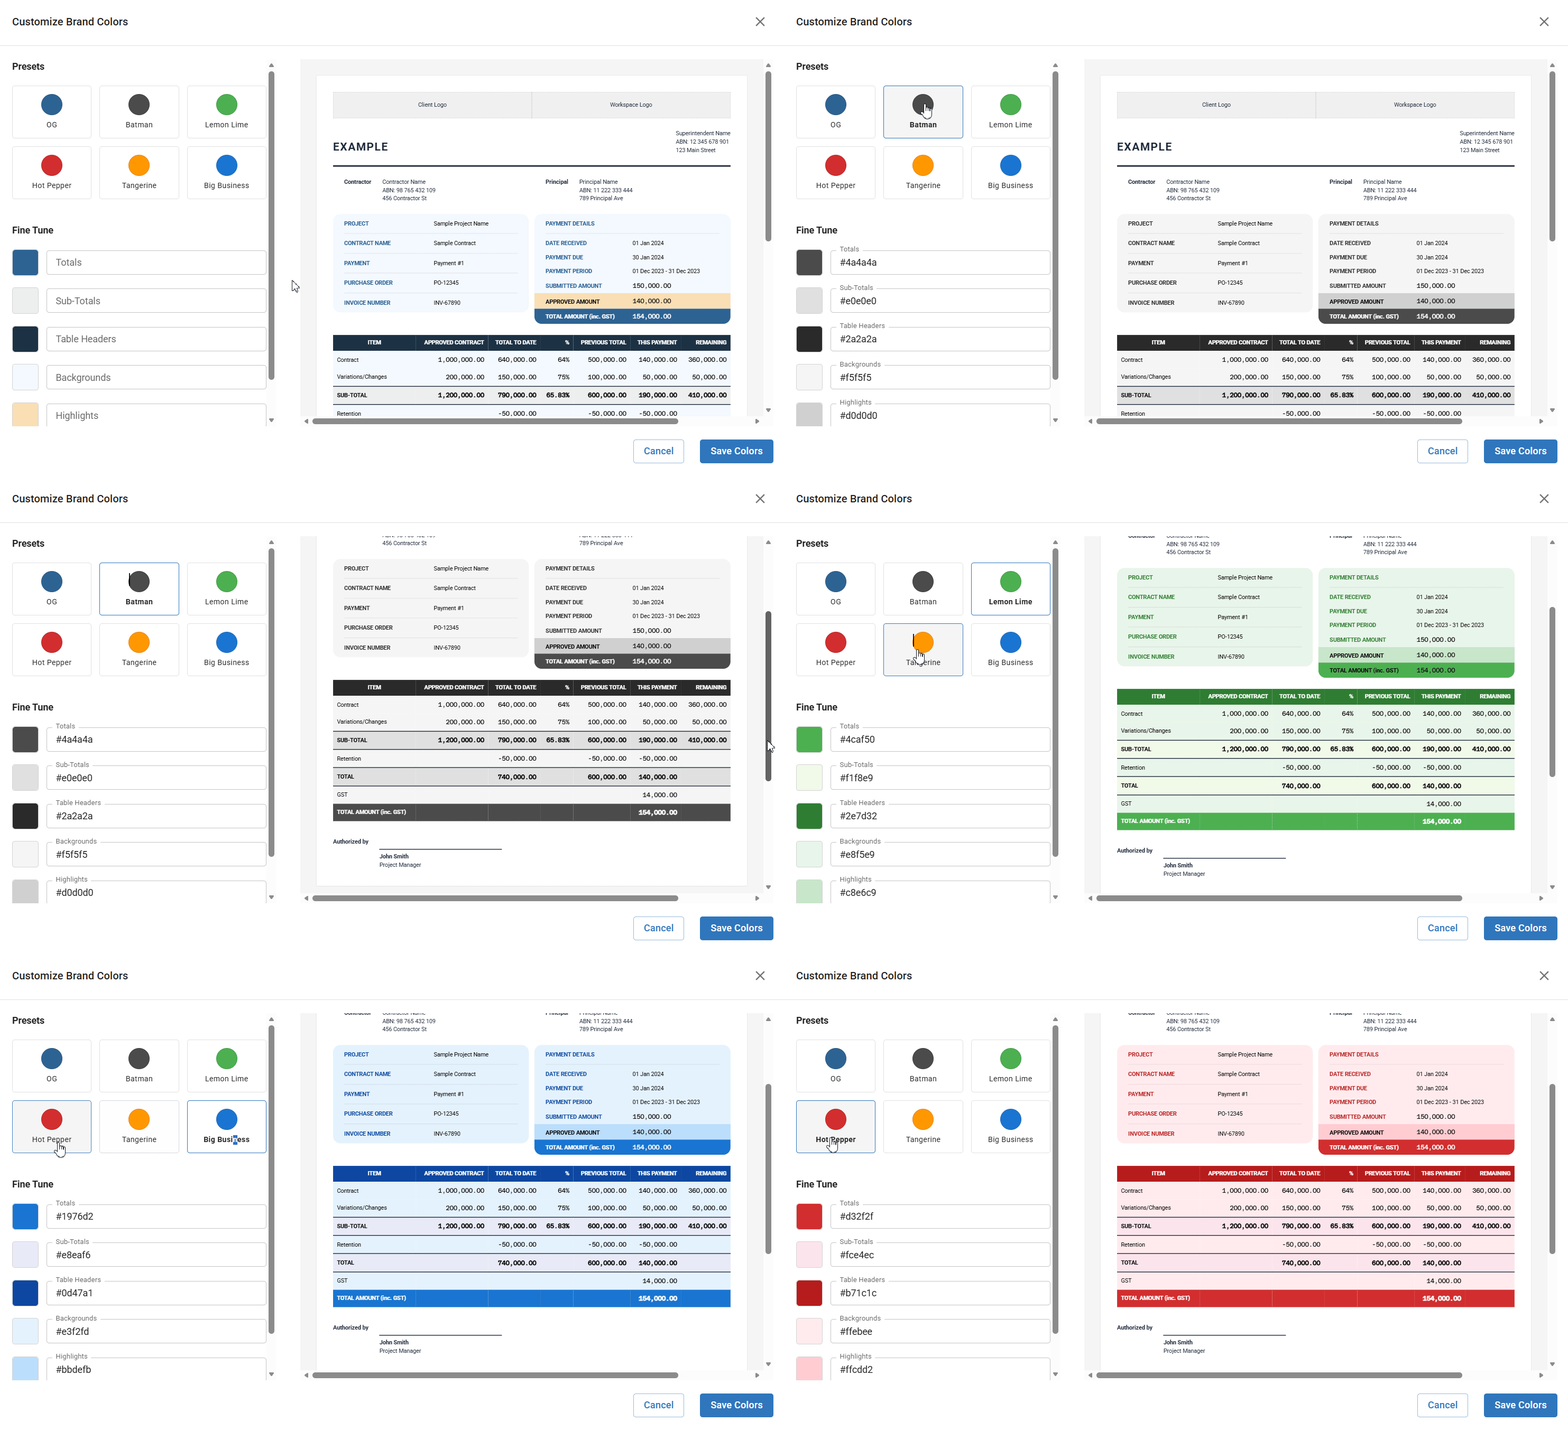
- At the top of the modal, find the Preset section with several colour options.
- Click any preset to select it.
- Check the preview on the right, which updates immediately to show how your letters will look.
To fine-tune individual colours, scroll down to the Fine-Tune section:
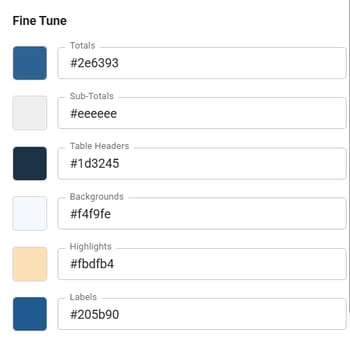
- Click the colour square to open the colour picker, or type a hex code directly into the text field.
- Adjust individual colour settings as needed (Totals, Subtotals, Table Headers, Backgrounds, Highlights and Labels).
Tip: If you have specific brand guidelines with hex codes, typing them directly ensures exact colour matching.
Save your workspace brand colours
- Review the preview to confirm your colours look correct.
- Click the blue Save Colors button.
Your workspace brand colours are now saved and will apply to all variation letters and payment letters across all projects in this workspace.
Set brand colours at project level
Use project level branding when a specific project needs different colours from your workspace default.
Open project branding settings
- Navigate to your project and open the Project Dashboard.
- Click the Settings button (cog icon) at the bottom of the left navigation sidebar.
- In the Project Settings modal, click the Brand tab in the left menu.
- Scroll down and click Customise Brand Colours.
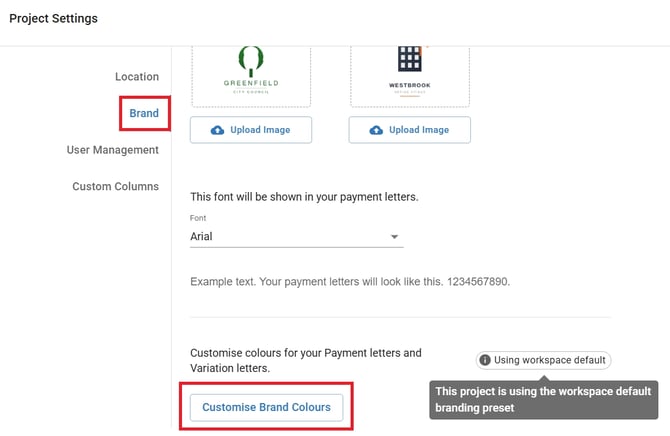
Note: If you see Using workspace default, the project is currently using workspace level brand colours. Hover over the information icon to see more details about inheritance settings.
Apply a project-specific preset or fine-tune colours
Tip: Selecting a preset or making any colour changes at the project level overrides the workspace default for this specific project only.
To use a preset:
- At the top of the modal, find the Preset section. The first preset is labelled Workspace Default, which is the inherited workspace brand.
- Click any other preset to apply project-specific branding.
- Check the preview, which updates to show how your project letters will look.
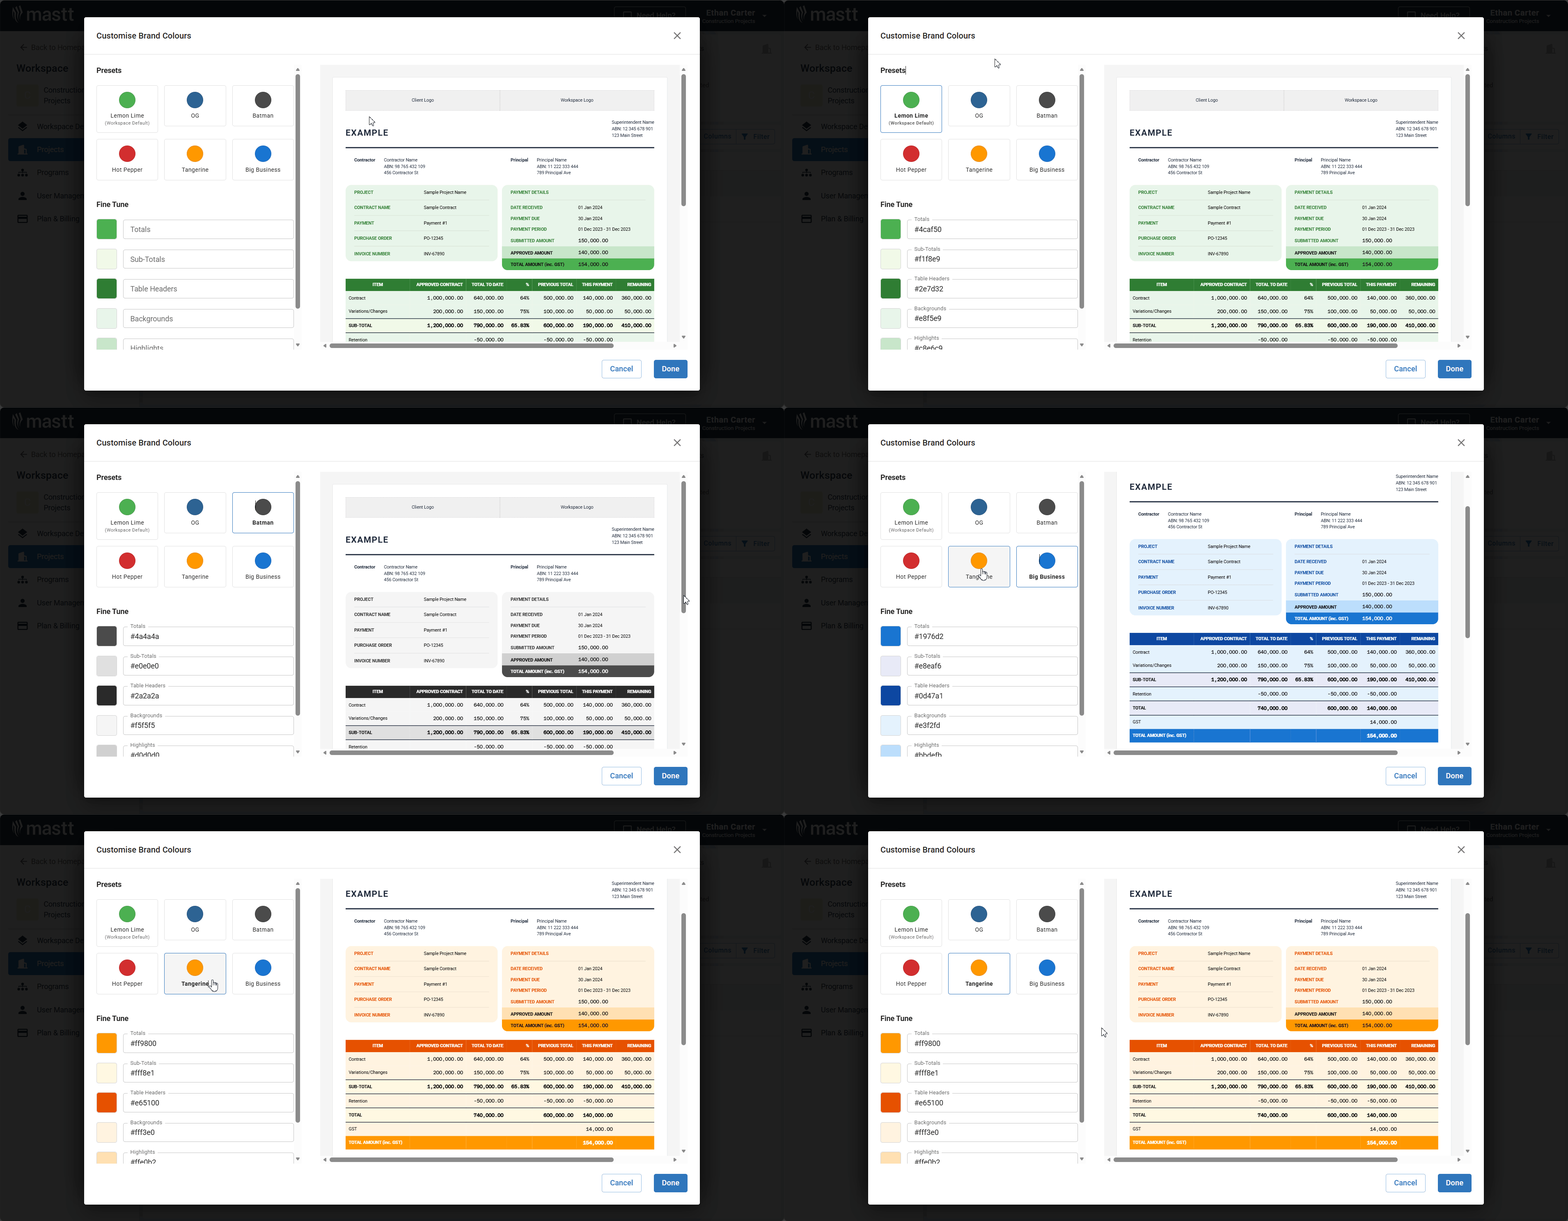
To fine-tune individual colours:
- Scroll down to the Fine-Tune section.
- Click the colour square to open the colour picker, or type a hex code directly into the text field.
Tip: If your client has specific brand guidelines, use their exact hex codes to ensure variation and payment letters match their corporate identity.
Save your project brand colours
- Review the preview to confirm your colours look correct.
- Click the blue Done button to close the Brand Colours modal.
- Click Save on the Project Settings modal to save all project settings.
Your project level brand colours are now saved and will apply to all variation letters and payment letters generated from this project.
Troubleshooting and FAQs
Will workspace brand colours affect projects that already have custom branding?
No. Projects with custom brand colours keep their project-specific settings. Workspace colours only apply to projects using the default.
How do I reset a project to use workspace brand colours?
Open the project's Brand settings and select the Workspace Default preset at the beginning of the preset options. This reverts the project to inherit workspace level branding.
Need help?
Contact Mastt Support for additional assistance with brand customisation.