Risk Bulk Upload allows you to add multiple risks to your project at once using a CSV file. Instead of creating risks individually, you can upload dozens or hundreds of risks in seconds. This feature is ideal for setting up new projects with standard risks or ensuring consistency across your construction portfolio.
Accessing Bulk Upload
- From your project, click Risk in the left navigation bar to open your risk register
- Click into your browser's address bar—the URL should look similar to:
.../projects/63fea50a6ed85e001a5d0d39/risks - Add
?upload=trueto the end of the URL so it looks like:.../projects/63fea50a6ed85e001a5d0d39/risks?upload=true - Press Enter to reload the page
The bulk upload interface now appears with additional options.
Preparing Your Risk Data
You have two options for creating your risk data:
Copy a Risk Register Using CSV
Use this method to copy risks from an existing Mastt project.
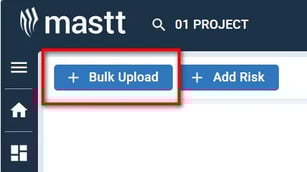
- Click + Bulk Upload at the top left of the page
- Click Download Current Register to download a CSV file containing your existing risks
- Navigate to the project where you want to import these risks
- Follow the steps in Importing Your Risks below
Use Mastt AI Risk Register Generator
Use this method to convert existing risk data from other formats or generate sample risks for your project type.
This requires a ChatGPT account.
- Navigate to the Mastt AI Risk Register Generator
- Use the AI tool to convert your existing risk data:
- Paste your existing risk register from Excel, Word, or other formats
- The AI converts your data into Mastt's required CSV format
- Alternatively, request sample risks for your project type if starting from scratch
- Review the AI-generated risk register for accuracy, ensuring all required fields are populated
- Download the file in CSV format
The AI creates a complete risk register using Mastt's template format with all required columns and correct field types.
Importing Your Risks
Upload Your File
- Return to the Bulk Upload form in your target project
- Click inside the bulk upload box to open a file picker and select your CSV file, or drag your CSV file directly into the box
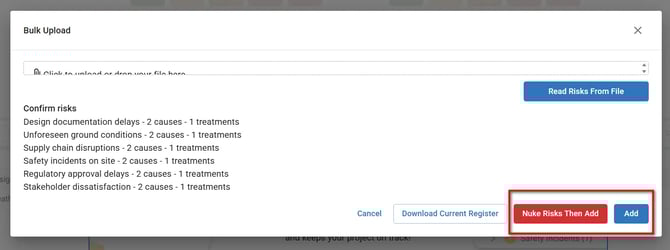
- Click Read Risks from File
Review and Import
- Review the risk list preview before importing—check that:
- All risks are present (count matches your CSV)
- Risk descriptions are correct
- No data is missing or corrupted
- Field values make sense (likelihood, impact, etc.)
- Choose your import option:
- Add: Adds these risks alongside any existing risks in the module. Use this when you want to keep existing risks and supplement them with new ones.
- Nuke Risk Then Add: Deletes ALL existing risks permanently, then imports the new risks. Use this when you want to completely replace your risk register.
- Click your chosen import option to complete the upload—Mastt displays a confirmation message showing how many risks were successfully imported
- Scroll through your risk register to verify all risks imported correctly with complete details
Nuke Risk Then Add permanently deletes all current risks before importing. Download your current risk register as a backup first if there's anything you want to preserve.
Troubleshooting & FAQs
Q: What if my CSV file won't upload or shows errors?
Always use Mastt's downloaded template rather than creating your own file. Ensure you've saved the file in .csv format (not Excel .xlsx).
Q: What if I accidentally chose "Nuke Risk Then Add" and lost my risks?
Contact Mastt Support for assistance.
Need Help?
Contact Mastt Support for additional assistance with Risk Bulk Upload.