User management in Mastt allows you to control who can access your projects and programs, and what actions they can perform. This guide covers adding users, removing users, and modifying permission levels at both project and program levels.
Before You Start
- You need Admin permission for the project or program you want to manage
- Have the user's email address ready
Accessing User Management
- Navigate to your Home page and click Projects or Programs in the left navigation bar
- Find the project or program you want to manage
- Click the Action button beside the name
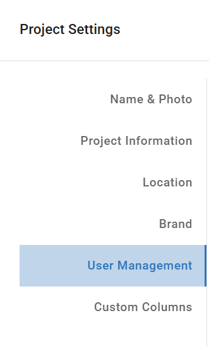
- Select Project Settings or Program Settings
- Click User Management in the left menu
Alternatively, from inside your project or program, click the Settings icon (cog) in the bottom-left navigation bar, then click User Management in the left menu.
Managing Users at the Project Level
Add a User
- Enter the user's email address in the Enter email to invite field, or select from existing workspace users in the dropdown
- Select the permission level from the dropdown:
- Viewer — Read-only access to view project information
- Standard — Can create, edit, and manage project data but cannot change settings
- Click Invite Users

Existing workspace users appear immediately. New users receive an email invitation to create an account.
Remove a User
- Find the user in the list
- Click the Action button beside their name
- Select Remove
- Confirm the removal when prompted
The user is immediately removed from the project and loses access.
To remove or disable a user across all projects at once, see How to Remove or Disable Users.
Modify User Permissions
- Find the user in the list
- Click the Action button beside their name
- Select the new permission level:
- Upgrade to Admin — Full project administration access and capabilities
- Downgrade to Standard — Can create, edit, and manage project data but cannot change settings
- Downgrade to Viewer (Read only) — View-only access to project data
The available options depend on the user's current role.
Managing Users at the Program Level
User management at the program level follows the same process as project-level management.
Add a User
- Enter the user's email address or select from the dropdown
- Choose the permission level
- Click Invite Users
Existing workspace users appear immediately. New users receive an email invitation to create an account.
Remove a User
- Find the user in the list
- Click the Action button beside their name
- Select Remove
- Confirm the removal when prompted
Removing a user from a program does not automatically remove them from individual projects within that program. You may need to manage project-level access separately.
Modify User Permissions
- Find the user in the list
- Click the Action button beside their name
- Select the new permission level
Troubleshooting & FAQs
Q: Can I add a user who doesn't have a Mastt account yet?
Yes. Enter their email address and click Invite Users. They will receive an email prompting them to create a Mastt account before accessing the project or program.
Q: Why can't I see User Management in Project Settings?
You need Admin permission to access User Management. Contact your project or program admin to request access.
Q: What happens if I accidentally remove a user?
Re-invite them using their email address or by selecting their existing account from the dropdown. Existing workspace users are added back immediately.
Q: If I remove a user from a program, are they removed from all projects?
No. Program-level and project-level access are managed separately. You must remove users from individual projects if you want to revoke all access.
Need Help?
Contact Mastt Support for additional assistance with user management.